
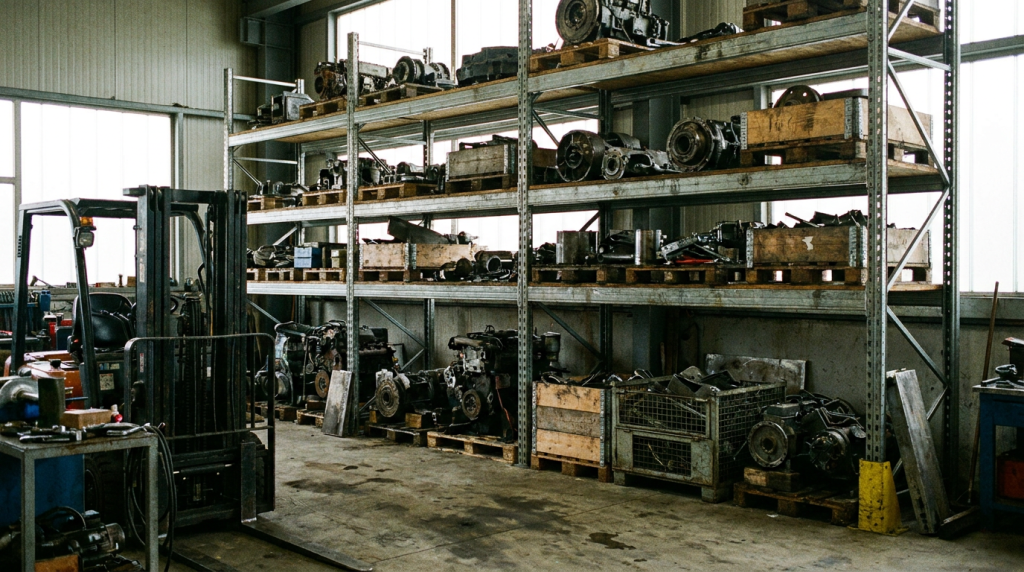
Strong, well-built shop shelves are one of the best investments you can make for your garage, workshop, basement, warehouse, or maintenance shop. Heavy-duty shelving keeps tools organized, protects expensive equipment, clears valuable floor space, and makes your workspace safer and more efficient.
While commercial shelving systems can cost hundreds—or even thousands—of dollars, building your own heavy-duty shop shelves allows you to customize the size, strength, and layout for your specific storage needs while saving money.
Whether you’re storing power tools, hardware bins, automotive supplies, lumber, paint, or seasonal equipment, this guide will walk you through building durable shop shelves that can provide years of reliable service.
Why Build Heavy-Duty Shop Shelves?
Proper shelving improves more than organization—it improves workflow.
Benefits include:
- Maximizes vertical storage space
- Keeps heavy items off the floor
- Makes tools easier to find
- Improves workshop safety
- Reduces clutter
- Protects equipment from moisture
- Creates more usable workspace
- Customizes storage to your needs
Whether you’re a contractor, mechanic, woodworker, maintenance technician, farmer, or DIY homeowner, heavy-duty shelving helps you work more efficiently.
Plan Before You Build
Before purchasing lumber, spend a few minutes planning your layout.
Ask yourself:
- What will these shelves store?
- How much weight will each shelf support?
- Will the shelves be wall-mounted or freestanding?
- Should they fit around windows or electrical panels?
- Will rolling tool carts need to fit underneath?
- Do you need adjustable shelf heights?
Planning first helps eliminate costly mistakes during construction.
Recommended Shelf Dimensions
One of the most versatile configurations is:
Height: 72 inches
Length: 96 inches (8 feet)
Depth: 24 inches
Shelf spacing:
Bottom shelf: 18 inches
Middle shelves: 16–20 inches apart
Top shelf: Remaining space
These dimensions accommodate most storage totes while making efficient use of standard 4×8 sheets of plywood.
Materials You’ll Need
For a basic heavy-duty shelving unit:
- 2×4 framing lumber
- 3/4-inch cabinet-grade plywood
- 3-inch structural screws
- 1-5/8-inch wood screws
- Construction adhesive (optional)
- Wood filler
- Sandpaper
- Polyurethane or paint
- Heavy-duty lag screws (for wall attachment)
- Washers
For damp environments, pressure-treated lumber may be a better option.
Recommended Tools
You’ll need:
- Circular saw
- Miter saw
- Drill/driver
- Impact driver
- Tape measure
- Carpenter’s square
- Level
- Stud finder
- Clamps
- Safety glasses
- Hearing protection
If you’re installing shelving on concrete or masonry walls, you’ll also need a hammer drill and concrete anchors. Our guide on How to Install Concrete Anchors explains the process step by step.
Choosing the Right Wood
While many materials can be used, these are the most common choices.
2×4 Lumber
Excellent for framing.
Strong, inexpensive, and readily available.
3/4-Inch Plywood
Provides excellent shelf strength.
Resists sagging better than thinner materials.
OSB
A more economical alternative.
Suitable for many workshops but generally less durable than quality plywood.
Particle board is generally not recommended for heavy-duty shelving because it sags under heavy loads and performs poorly in damp environments.
Wall-Mounted vs. Freestanding Shelves
Wall-Mounted Shelves
Advantages:
- Extremely stable
- Uses fewer materials
- More floor space
- Less chance of tipping
Best for:
- Garages
- Workshops
- Basements
- Utility rooms
Freestanding Shelves
Advantages:
- Can be moved later
- No wall modification required
- Ideal for rental properties
- Accessible from both sides
Best for:
- Warehouses
- Large shops
- Storage buildings
Understanding Shelf Load Capacity
The amount of weight your shelves can safely support depends on several factors:
- Lumber quality
- Shelf depth
- Span length
- Number of supports
- Fastener type
- Decking thickness
- Construction quality
As a general rule:
Shorter spans support heavier loads.
More vertical supports increase strength.
Thicker plywood reduces sagging.
Heavy items should always be stored on lower shelves.
If you’re storing extremely heavy items such as engine components, machine parts, or large toolboxes, consider adding additional vertical supports or reducing shelf span.
Step 1: Measure Your Space
Measure carefully before cutting lumber.
Identify:
- Wall length
- Ceiling height
- Door swing
- Windows
- Electrical outlets
- Light switches
- Pipes
- Garage door tracks
If mounting to a wall, locate every stud.
Mark stud locations clearly with painter’s tape or pencil.
Step 2: Cut the Lumber
Cut your framing members.
For each shelf you’ll need:
- Front rail
- Rear rail
- Side rails
- Cross braces
Cut vertical legs to the desired height.
Cut plywood decking to fit each shelf frame.
Always measure twice before cutting.
Step 3: Build the Shelf Frames
Assemble each shelf frame on a flat surface.
Check each corner with a carpenter’s square.
Install cross braces every 16 to 24 inches.
Cross supports dramatically increase load capacity while reducing plywood flex.
Fasten the joints using structural screws.
Construction adhesive can add additional rigidity.
Step 4: Install the Vertical Supports
Attach the legs to the bottom shelf first.
Continue upward one shelf at a time.
Check for:
- Square
- Level
- Plumb
Correcting alignment during construction is much easier than after the shelving is complete.
Step 5: Secure the Shelving
For wall-mounted shelves:
Fasten directly into wall studs using lag screws or structural screws.
Never rely on drywall anchors for heavy-duty shelving.
If installing into masonry or concrete, use properly sized concrete anchors rated for the anticipated load.
Step 6: Install the Shelf Decking
Lay the plywood onto each completed frame.
Secure it using wood screws approximately every 12 inches around the perimeter and along each cross brace.
Countersink screws slightly below the surface.
Fill screw holes if you plan to paint.
Step 7: Reinforce the Structure
For maximum strength, consider adding:
- Diagonal braces
- Corner gussets
- Steel angle brackets
- Additional center supports
- Rear cross bracing
These upgrades are especially worthwhile if you’ll be storing several hundred pounds per shelf.
Step 8: Sand and Finish
Smooth all exposed edges.
Round sharp corners slightly.
Apply your preferred finish.
Popular choices include:
- Polyurethane
- Workshop enamel
- Oil-based paint
- Clear wood sealer
A sealed surface is easier to clean and helps protect the wood from moisture.
Organizing Your Shelves
A good shelving system should make your workflow easier.
Consider organizing by category.
Top shelves
- Seasonal items
- Lightweight storage
- Spare materials
Middle shelves
- Frequently used tools
- Fasteners
- Paint
- Electrical supplies
Bottom shelves
- Toolboxes
- Compressors
- Power tools
- Automotive fluids
- Heavy equipment
Using labeled storage bins further improves organization.
Workshop Storage Ideas
Heavy-duty shelves work well for storing:
- Cordless power tools
- Battery chargers
- Air tools
- Welding supplies
- Lumber offcuts
- Fasteners
- Paint cans
- Automotive chemicals
- Gardening supplies
- Cleaning products
- Safety equipment
You can also add:
- Pegboard
- Magnetic tool holders
- Power strips
- LED lighting
- Drawer organizers
- Storage bins
- Hooks for extension cords and air hoses
Safety Tips
Always wear:
- Safety glasses
- Hearing protection
- Work gloves
Clamp lumber securely before cutting.
Never overload shelves beyond their intended capacity.
Store the heaviest items on lower shelves.
Inspect shelving periodically for:
- Loose screws
- Sagging
- Water damage
- Cracked lumber
- Wobbling
Repair problems immediately before they become safety hazards.
Common Mistakes to Avoid
Using undersized lumber
Skipping cross braces
Not fastening into studs
Using thin plywood
Overloading long shelf spans
Ignoring shelf sag
Using drywall screws for structural framing
Building shelves too deep to access comfortably
Failing to leave room for future storage
Related Articles
Continue improving your workshop with these helpful guides:
- Build a Rolling Tool Cart
- How to Replace Trailer Lights
- How to Install Concrete Anchors
- Hammer Drill vs. Rotary Hammer: Concrete Drilling Explained
- Essential PPE for Construction and Industrial Work
Frequently Asked Questions
What is the best wood for heavy-duty shop shelves?
A combination of 2×4 framing and 3/4-inch plywood provides an excellent balance of strength, durability, and cost.
How much weight can DIY shop shelves hold?
Properly constructed shelves with adequate supports can often hold several hundred pounds per shelf. Actual capacity depends on lumber, fasteners, spacing, and construction quality.
Should I build freestanding or wall-mounted shelves?
Wall-mounted shelves are generally stronger and more stable, while freestanding shelves offer flexibility if you need to relocate them later.
How deep should shop shelves be?
For most garages and workshops, 18 to 24 inches is ideal. Deeper shelves can make it difficult to reach items stored in the back.
Is plywood better than OSB?
For long-term durability and heavy loads, 3/4-inch plywood is generally the better choice, although OSB is a cost-effective alternative for many applications.
Build Storage That Lasts
Heavy-duty shop shelves are one of the most valuable upgrades you can make to any workspace. With quality materials, proper framing, and careful construction, your shelving system can safely support heavy tools and equipment while keeping your workshop organized and efficient.
Whether you’re organizing a professional maintenance shop, home garage, agricultural building, or woodworking space, CEM Industrial Supply offers the tools, fasteners, safety equipment, adhesives, and workshop supplies you need to build with confidence.