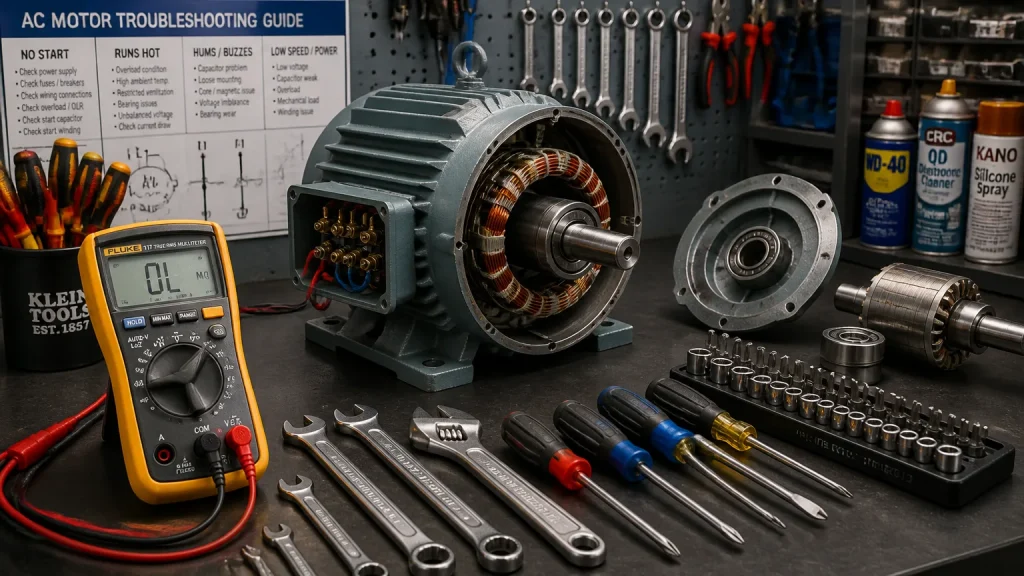
AC motor troubleshooting is essential for maintaining efficiency in various applications, especially in contractor jobs and manufacturing processes. AC motors power everything from conveyor belts to HVAC systems. When they malfunction, the impact can be significant, leading to downtime and increased costs.
Common signs of motor issues include unusual noises, overheating, and inconsistent performance. DIYers should be alert to these symptoms, as they can indicate underlying problems that need immediate attention. Addressing these issues early can prevent further damage and save you time and money.
Understanding the types of AC motors is also crucial. For instance, knowing the difference between single-phase and three-phase motors can help you diagnose problems more effectively. If you’re curious about their common failures and symptoms, check out our article on Single-Phase vs Three-Phase Motors: Common Failures and Symptoms.
By mastering AC motor troubleshooting, you’ll not only enhance your skills but also ensure your projects run smoothly and efficiently.
1. Checking Electrical Supply and Connections
Start with the basics: ensure your AC motor receives the correct electrical supply. Use a multimeter to check voltage levels. Verify that the power supply matches the motor’s specifications. Low voltage can cause inefficient performance or even failure.
Next, inspect all wiring connections. Loose or corroded connections are common culprits in motor issues. A loose wire can create resistance, leading to overheating. Corrosion can interrupt the flow of electricity, causing erratic behavior or complete shutdowns.
Look for signs of wear, such as frayed wires or burned terminals. These conditions can lead to further complications if not addressed promptly. If you spot any problems, make the necessary repairs or replacements.
Always prioritize safety. Disconnect power before handling any wiring. This step protects you while ensuring effective AC motor troubleshooting. By keeping your electrical supply and connections in check, you set a solid foundation for your motor’s performance.
2. Inspecting the Motor for Physical Damage
Start with a visual inspection of your AC motor. Look for obvious physical damage, such as cracks, dents, or corrosion. These issues can significantly impact performance and lead to further complications.
Check the motor housing for any signs of wear. A cracked casing can allow dust and moisture in, leading to premature failure. Dents may also affect the alignment of internal components, causing additional strain.
Next, inspect the bearings and shafts. To do this, rotate the shaft manually. It should move smoothly without any grinding sounds. If you notice unusual resistance or noise, the bearings may need lubrication or replacement.
Examine the bearings for signs of wear, such as discoloration or rust. These indicators can signal that the bearings are failing and need attention. Additionally, check for any misalignment between the shaft and the motor housing. Misalignment can cause excessive vibration, further damaging the motor.
By identifying these physical issues early, you can take action to prevent more extensive repairs during your AC motor troubleshooting process.
3. Testing Motor Windings and Insulation
To assess the condition of your AC motor, testing the windings and insulation is crucial. Start by using a multimeter set to the resistance (ohms) setting. Disconnect the motor from power and remove any terminal covers. Place the multimeter probes on the winding terminals. A healthy winding should show a low resistance reading, typically between 1 to 10 ohms.
Next, check the insulation resistance. This step is vital as low insulation resistance can indicate potential motor failure. Use a megohmmeter for this test. Connect one lead to a winding and the other to the motor housing. A reading below 1 megohm suggests insulation breakdown, which can lead to shorts and other significant issues.
Remember, these tests can help you differentiate between problems in the windings and those in other components. For example, if you’re unsure whether to repair or replace parts, check out our article on Bearings vs Windings: How to Tell What’s Failing. This knowledge will empower you in your AC motor troubleshooting efforts, ensuring lasting performance.
4. Evaluating the Capacitor Functionality
Capacitors play a crucial role in AC motors by providing the necessary starting torque and stabilizing voltage. If your motor struggles to start, runs intermittently, or exhibits unusual humming sounds, a failing capacitor could be the culprit.
To test a capacitor, start by ensuring the power is disconnected. Use a multimeter with a capacitance setting to measure the capacitor’s value. A significant deviation from the rated capacitance indicates a problem. Additionally, look for signs of physical damage, such as bulging or leaking, which are clear symptoms of failure.
If you find a faulty capacitor, replacement is straightforward. Make sure to purchase a capacitor rated for your specific motor. When installing, ensure you’re connecting the leads correctly, matching the markings on the capacitor.
Remember, working with capacitors can be dangerous. Always discharge the capacitor before handling it. This precaution helps prevent electrical shock, ensuring your AC motor troubleshooting remains safe and effective.
5. Analyzing Performance Under Load
Final checks involve assessing the motor’s performance under load. Start by observing the motor during startup. It should reach full speed without unusual delays or stalling. If it struggles, this may indicate issues with the power supply or internal components.
Next, monitor how the motor handles its operational load. Listen for any unusual noises, like grinding or clicking, which can signal internal problems. Pay attention to vibrations as well; excessive shaking may indicate misalignment or bearing issues.
Heat generation is another critical factor. After running the motor for a while, carefully feel the casing. If it’s excessively hot to the touch, this could point to overloading or insufficient lubrication. Too much heat can lead to premature failure, so take action if you notice this.
By analyzing these performance indicators, you can pinpoint potential problems. Effective AC motor troubleshooting at this stage can save you time and money in the long run.
Final Thoughts on Troubleshooting AC Motors
Troubleshooting AC motors doesn’t have to be overwhelming. By approaching the process systematically, you can identify issues early and take appropriate action. Understanding motor operation is crucial; it helps prevent future problems and ensures your projects run smoothly.
Remember to prioritize safety throughout your troubleshooting efforts. Always disconnect power before diving into any repairs. If you’re considering whether to repair or replace components, check out our guide on Rebuild vs Replace: When rebuilding makes sense for further insights.
With the right knowledge and techniques, you’ll enhance your skills and confidence in AC motor troubleshooting. Keep learning, stay safe, and tackle each project with assurance.