
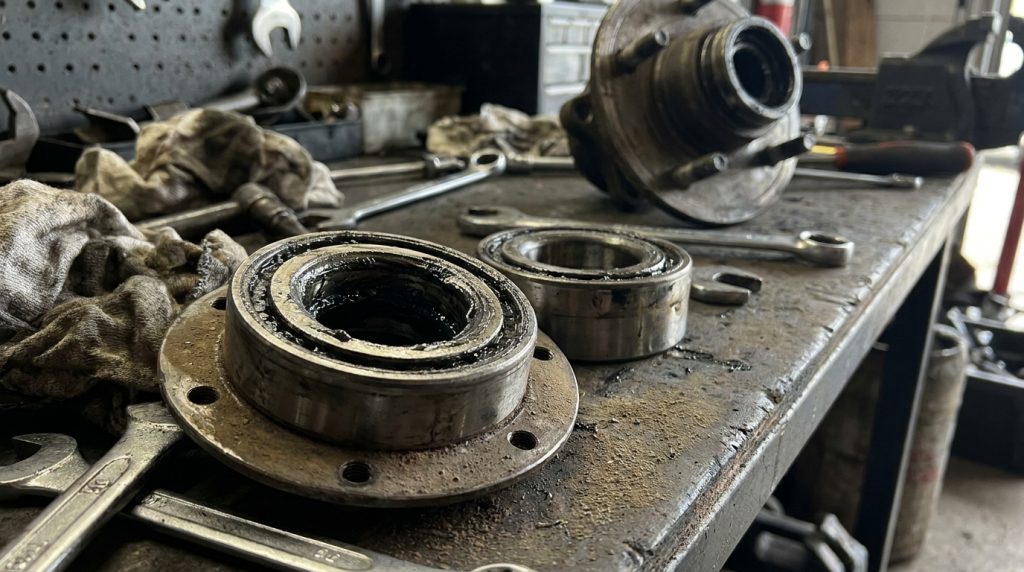
Replacing worn trailer bearings is one of the most important maintenance tasks you can perform to keep your trailer safe on the road. Although wheel bearings are relatively small components, they support the entire weight of your trailer while allowing the wheels to rotate smoothly. When bearings wear out or lose lubrication, they can overheat, damage the hub, seize the wheel, or even cause complete wheel separation.
Whether you own a utility trailer, boat trailer, enclosed cargo trailer, travel trailer, horse trailer, or equipment trailer, understanding how to replace worn trailer bearings can help prevent expensive repairs and dangerous roadside failures.
What Do Trailer Bearings Do?
Trailer wheel bearings fit inside the hub assembly and allow the wheels to rotate around the axle spindle with minimal friction.
Properly functioning bearings:
- Support the trailer’s weight
- Reduce rolling resistance
- Maintain wheel alignment
- Prevent excessive heat
- Improve towing stability
- Extend axle and hub life
Without properly lubricated bearings, even a short trip can lead to catastrophic failure.
Signs Your Trailer Bearings Need Replacement
Trailer bearings often show warning signs before they fail.
Common symptoms include:
- Grinding noises
- Humming or growling sounds
- Excessive hub heat
- Wheel wobble
- Uneven tire wear
- Grease leaking from the hub
- Burning smell
- Metal shavings in grease
- Rough wheel rotation
If you notice any of these symptoms, inspect the hub assembly before towing again.
Common Causes of Bearing Failure
Wheel bearings commonly fail because of:
- Lack of lubrication
- Water contamination
- Dirt entering the hub
- Damaged grease seals
- Overloading the trailer
- Improper bearing adjustment
- Excessive heat
- Normal wear
Boat trailers are especially susceptible because repeated water immersion can contaminate grease.
Tools You’ll Need
Gather everything before beginning.
Recommended tools include:
- Floor jack
- Jack stands
- Wheel chocks
- Lug wrench
- Socket set
- Torque wrench
- Pliers
- Hammer
- Flat screwdriver
- Seal puller
- Bearing packer (optional)
- Brake cleaner
- Shop towels
- Rubber mallet
- Safety glasses
- Work gloves
Never rely solely on a hydraulic jack while working.
Replacement Parts
Have the following available:
- Inner bearing
- Outer bearing
- Bearing races
- Grease seal
- Cotter pin
- Dust cap (if needed)
- High-temperature wheel bearing grease
- Replacement hub (if damaged)
Always match replacement bearings to your trailer’s axle specifications.
Step 1: Secure the Trailer
Park on a flat surface.
Then:
- Set the tow vehicle parking brake.
- Chock the opposite wheels.
- Loosen lug nuts slightly.
- Raise the trailer.
- Support it securely with jack stands.
Safety should always come first.
Step 2: Remove the Wheel
Remove the lug nuts completely.
Lift the wheel off the hub.
Place the wheel aside where it won’t roll.
Step 3: Remove the Dust Cap
Using a screwdriver and hammer:
Carefully work around the dust cap until it loosens.
Avoid damaging it if you intend to reuse it.
Replace damaged dust caps whenever possible.
Step 4: Remove the Cotter Pin and Spindle Nut
Straighten and remove the cotter pin.
Then remove:
- Retainer
- Castle nut
- Washer
Keep the components clean and organized.
Step 5: Remove the Hub
Carefully slide the hub toward you.
The outer bearing will usually come out first.
Support the hub to prevent dropping it.
Step 6: Remove the Inner Bearing and Seal
Turn the hub over.
Use a seal puller to remove the grease seal.
Discard the old seal.
Remove the inner bearing.
Most grease seals should never be reused.
Step 7: Clean All Components
Using brake cleaner:
Clean:
- Hub
- Spindle
- Washer
- Nut
- Reusable components
Remove every trace of old grease.
Cleanliness is essential when installing new bearings.
Step 8: Inspect the Spindle
Carefully examine the spindle.
Look for:
- Heat discoloration
- Grooves
- Scoring
- Rust
- Cracks
- Excessive wear
A damaged spindle may require professional repair or axle replacement.
Step 9: Inspect or Replace the Bearing Races
Check the bearing races inside the hub.
Replace them if you find:
- Pitting
- Grooves
- Cracks
- Bluish discoloration
- Rough surfaces
New bearings should ideally run on new races.
Step 10: Pack the Bearings with Grease
Thoroughly force fresh grease through every roller.
You can use:
- Hand packing
- Bearing packing tool
Continue until grease emerges through the opposite side of the bearing.
Every roller must be completely lubricated.
Step 11: Install the Inner Bearing
Place the packed inner bearing into the rear of the hub.
Install a new grease seal.
Tap the seal evenly until fully seated.
Avoid damaging the sealing surface.
Step 12: Reinstall the Hub
Carefully slide the hub back onto the spindle.
Avoid damaging the new grease seal.
Install:
- Outer bearing
- Washer
- Castle nut
Step 13: Adjust Bearing Preload
Rotate the hub while tightening the spindle nut.
Then:
- Back the nut off slightly.
- Retighten according to manufacturer specifications.
The hub should spin smoothly without noticeable looseness.
Proper bearing adjustment is critical for long service life.
Step 14: Install Cotter Pin and Dust Cap
Insert a new cotter pin.
Secure the castle nut.
Tap the dust cap back into place.
Replace damaged caps whenever necessary.
Step 15: Reinstall the Wheel
Install the wheel.
Hand-tighten the lug nuts.
Lower the trailer.
Torque the lug nuts using a star pattern according to the manufacturer’s specifications.
Test the Repair
Before towing:
- Spin the wheel by hand.
- Check for smooth rotation.
- Verify there is no excessive play.
- Confirm the wheel turns quietly.
Take a short test drive.
After several miles:
Check the hub temperature.
Warm is normal.
Excessive heat indicates improper adjustment or another problem.
How Often Should Trailer Bearings Be Serviced?
General recommendations include:
- Inspect annually
- Repack every 12 months or 12,000 miles
- Inspect before long trips
- Service boat trailers more frequently
- Replace bearings showing wear immediately
Heavy commercial use may require more frequent inspections.
Replace vs. Repack
Repacking is appropriate when:
- Bearings remain smooth
- Rollers show no damage
- Races remain clean
- No discoloration exists
Replace bearings if you find:
- Rust
- Pitting
- Cracks
- Flat spots
- Missing rollers
- Blue heat marks
- Rough rotation
Bearings are inexpensive compared to the cost of roadside failures.
Common Mistakes to Avoid
Avoid these common errors:
Reusing old grease seals
Installing dirty bearings
Mixing incompatible grease types
Overtightening the spindle nut
Ignoring worn bearing races
Allowing dirt into the hub
Failing to torque lug nuts properly
Continuing to tow with overheated hubs
Most premature bearing failures result from improper installation rather than defective parts.
Trailer Bearing Maintenance Tips
Keep your bearings in good condition by:
- Checking hubs before every trip
- Feeling hub temperature during fuel stops
- Repacking grease regularly
- Replacing damaged seals immediately
- Washing boat trailers after saltwater use
- Inspecting bearings before long-distance travel
Routine maintenance dramatically reduces the chance of roadside breakdowns.
Related Articles
Continue maintaining your trailer and towing equipment:
- Trailer Hub Maintenance Guide
- How to Replace a Trailer Hub Assembly
- Best Wheel Bearing Grease for Trailers
- Trailer Tire Safety Checklist
- Essential PPE for Trailer Maintenance
Frequently Asked Questions
How often should trailer bearings be replaced?
Most trailer bearings can last many years if properly maintained. Replace them whenever inspection reveals pitting, rust, excessive wear, overheating, or rough operation.
Can I simply add more grease?
No. If the grease is contaminated or the bearings are worn, they should be removed, cleaned, inspected, and repacked or replaced.
Should I replace the grease seal every time?
Yes. Grease seals are inexpensive and should generally be replaced whenever the hub is removed.
Why is one hub much hotter than the others?
An overheated hub often indicates a failing bearing, damaged seal, incorrect preload adjustment, or inadequate lubrication.
Can I replace trailer bearings myself?
Many trailer owners can replace bearings with basic mechanical skills, proper tools, and careful attention to cleanliness and torque specifications. If the spindle or hub is damaged, professional service is recommended.
Keep Your Trailer Safe on Every Trip
Replacing worn trailer bearings before they fail is one of the smartest investments you can make in trailer safety and reliability. Routine inspections, proper lubrication, quality replacement components, and correct installation help prevent costly breakdowns while protecting your trailer, cargo, and everyone sharing the road.
Whether you’re maintaining a boat trailer, enclosed cargo trailer, travel trailer, utility trailer, or commercial equipment trailer, CEM Industrial Supply offers premium wheel bearings, seals, bearing grease, hand tools, safety equipment, fasteners, and maintenance supplies to keep your trailer rolling safely for years to come.