
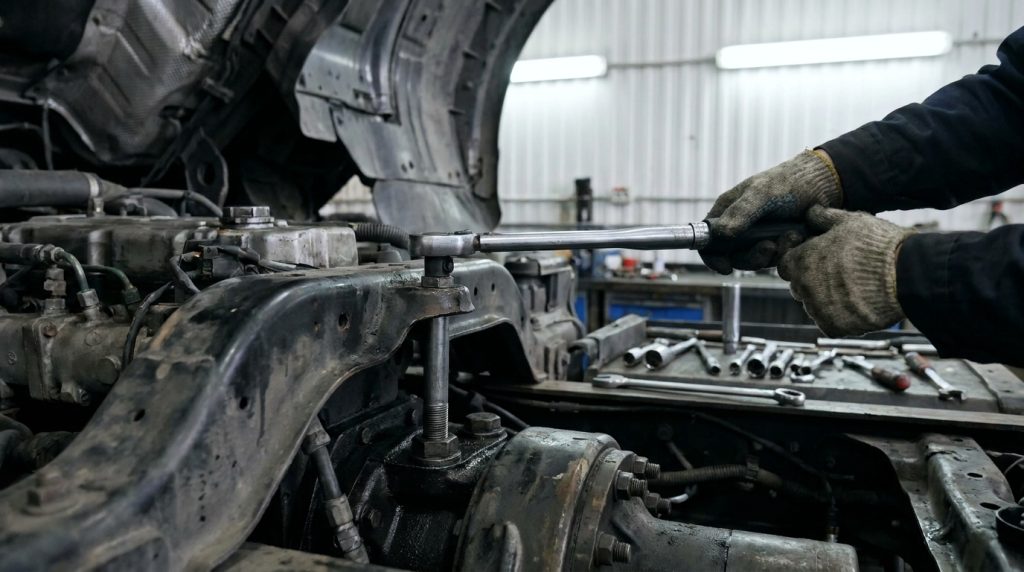
Correct bolt torque is the difference between a joint that holds safely for years and one that loosens, leaks, cracks, or fails under load. For contractors, maintenance teams, mechanics, manufacturers, and industrial buyers, understanding bolt torque specifications is essential for equipment reliability, structural safety, product quality, and code compliance.
Bolt torque specifications define how much rotational force should be applied to a fastener during installation. The goal is not simply to “tighten the bolt,” but to create the correct clamp load in the joint. Too little torque can lead to loosening, vibration failure, and leaks. Too much torque can stretch the bolt beyond its yield point, strip threads, damage gaskets, or fracture components.
This guide explains how bolt torque specifications work, what affects torque values, how to read torque charts, and how to choose the right torque for common industrial, mechanical, construction, and manufacturing applications.
Bolt torque specifications are recommended tightening values used to achieve a target clamping force in a bolted joint. Torque is typically expressed in:
- Foot-pounds: ft-lb
- Inch-pounds: in-lb
- Newton-meters: N·m
In American industrial and construction settings, ft-lb and in-lb are common. Metric equipment and international manufacturers often use N·m.
Torque vs. Clamp Load
Torque is the twisting force applied to a fastener. Clamp load, also called preload, is the tension created in the bolt that pulls the joint members together.
The real purpose of torque is to generate clamp load.
For example, when tightening a flange bolt, the applied torque stretches the bolt slightly. That stretch creates tension, which compresses the gasket and seals the flange. If the bolt is under-torqued, the gasket may leak. If it is over-torqued, the gasket may crush or the bolt may fail.
Why Torque Specifications Matter
Correct bolt torque specifications help prevent:
- Loose fasteners caused by vibration or thermal cycling
- Broken bolts and studs
- Stripped threads
- Warped flanges or housings
- Gasket leaks
- Uneven joint loading
- Premature bearing, wheel, or machinery failure
- Unsafe structural connections
- Costly downtime and rework
For high-value equipment, structural assemblies, pressure systems, vehicles, and machinery, torque control is not optional. It is part of a disciplined installation and maintenance process.
For those interested in understanding the importance of bolt torque specifications, you may find it beneficial to explore a related article that discusses the differences between various threadlockers, which can significantly impact the effectiveness of your torque applications. This article, titled “Threadlocker Throwdown: Loctite Red vs. Blue vs. Permatex,” provides insights into how different threadlocking compounds can influence the performance and reliability of bolted joints. You can read it here: Threadlocker Throwdown: Loctite Red vs. Blue vs. Permatex.
Key Factors That Affect Bolt Torque Specifications
Bolt torque specifications are not universal. The correct torque depends on several variables, including bolt size, grade, thread pitch, lubrication, material, and joint design.
Bolt Diameter
Larger bolts generally require higher torque because they have greater cross-sectional area and can generate higher clamp loads.
For example, a 1/2-inch Grade 8 bolt can safely handle more preload than a 1/4-inch Grade 8 bolt. However, larger size alone does not determine the correct torque. Thread condition, lubrication, and material strength also matter.
Bolt Grade or Strength Class
Bolt grade identifies the strength of the fastener. In inch-series fasteners, common grades include:
- SAE Grade 2
- SAE Grade 5
- SAE Grade 8
In metric fasteners, common property classes include:
- Class 8.8
- Class 10.9
- Class 12.9
Higher-grade bolts can typically accept more preload and higher torque, but only when used with compatible nuts, washers, and joint materials.
Thread Pitch
Thread pitch affects how torque converts into bolt tension. Fine threads often generate more clamp load than coarse threads at the same torque because of their shallower thread angle and mechanical advantage.
Common thread types include:
- UNC: Unified National Coarse
- UNF: Unified National Fine
- Metric coarse
- Metric fine
When checking bolt torque specifications, always confirm whether the fastener uses coarse or fine threads.
Lubrication and Coatings
Lubrication has a major impact on torque values. A lubricated bolt requires less torque to achieve the same clamp load because friction is reduced.
Common conditions include:
- Dry, plain steel
- Light oil
- Anti-seize compound
- Zinc plating
- Hot-dip galvanizing
- Phosphate coating
- Threadlocker
- Wax coating
A torque value specified for dry threads should not automatically be used on lubricated threads. Doing so can over-tension the bolt and cause failure.
Joint Material
The material being clamped also matters. Steel, aluminum, cast iron, plastic, composites, and gasketed joints behave differently under load.
For example:
- Aluminum threads are more prone to stripping than steel threads.
- Cast iron can crack if unevenly loaded.
- Plastic components may creep under sustained clamp force.
- Gasketed joints require controlled compression.
Always consider the weakest part of the joint, not just the bolt strength.
Washer Use and Bearing Surface
Washers help distribute load and reduce surface damage. Hardened flat washers are often required with high-strength bolts to prevent embedment and improve torque consistency.
Torque specifications may assume the use of a washer. If a washer is omitted, friction and bearing stress can change significantly.
Thread Engagement
Adequate thread engagement is required for the bolt or stud to develop proper strength. A common rule of thumb for steel is that thread engagement should be at least equal to the bolt diameter, but application-specific requirements may vary.
For softer materials such as aluminum, more engagement is often needed.
Common Bolt Torque Specification Charts
Torque charts provide general guidance for standard fasteners. They are useful for maintenance, fabrication, and field work, but they should not override manufacturer instructions, engineering drawings, equipment manuals, or code requirements.
SAE Bolt Torque Chart
The following table gives approximate torque values for clean, dry SAE bolts. Values are general references and may vary by standard, plating, lubrication, and application.
| Bolt Size | SAE Grade 2 | SAE Grade 5 | SAE Grade 8 |
|---|---|---|---|
| 1/4″-20 | 6 ft-lb | 10 ft-lb | 14 ft-lb |
| 5/16″-18 | 11 ft-lb | 19 ft-lb | 29 ft-lb |
| 3/8″-16 | 20 ft-lb | 33 ft-lb | 47 ft-lb |
| 7/16″-14 | 32 ft-lb | 54 ft-lb | 78 ft-lb |
| 1/2″-13 | 49 ft-lb | 78 ft-lb | 119 ft-lb |
| 9/16″-12 | 70 ft-lb | 114 ft-lb | 169 ft-lb |
| 5/8″-11 | 97 ft-lb | 154 ft-lb | 230 ft-lb |
| 3/4″-10 | 172 ft-lb | 257 ft-lb | 380 ft-lb |
| 7/8″-9 | 266 ft-lb | 382 ft-lb | 600 ft-lb |
| 1″-8 | 250 ft-lb | 587 ft-lb | 840 ft-lb |
These values are best used for non-critical general fastening when no manufacturer specification is available. For critical joints, consult engineering documentation.
Metric Bolt Torque Chart
The following table provides approximate dry torque values for common metric bolts.
| Bolt Size | Class 8.8 | Class 10.9 | Class 12.9 |
|---|---|---|---|
| M6 | 10 N·m | 14 N·m | 17 N·m |
| M8 | 25 N·m | 35 N·m | 42 N·m |
| M10 | 49 N·m | 69 N·m | 83 N·m |
| M12 | 86 N·m | 120 N·m | 145 N·m |
| M14 | 135 N·m | 190 N·m | 230 N·m |
| M16 | 210 N·m | 295 N·m | 355 N·m |
| M20 | 410 N·m | 580 N·m | 690 N·m |
| M24 | 710 N·m | 1,000 N·m | 1,200 N·m |
| M30 | 1,400 N·m | 2,000 N·m | 2,400 N·m |
Metric bolt torque specifications should always be matched to the property class marked on the bolt head.
Dry vs. Lubricated Torque
Lubricated threads reduce friction. As a result, less torque is required to produce the same clamp load.
| Thread Condition | Typical Effect on Torque |
|---|---|
| Dry, clean steel | Baseline reference for most published torque values |
| Lightly oiled threads | Often require lower torque because friction is reduced |
| Anti-seize compound | May require significantly lower torque to achieve the same clamp load |
| Zinc-plated fasteners | Friction can vary depending on the plating and finish, affecting required torque |
| Hot-dip galvanized fasteners | Typically create higher friction unless properly lubricated |
| Threadlocker applied | Torque requirements depend on the specific threadlocker product and installation method |
A common industrial practice is to reduce torque when lubricants or anti-seize compounds are used, but the exact reduction should come from the lubricant manufacturer, fastener standard, equipment manual, or engineering specification.
For more articles on industrial supply, visit https://cemindustrialsupply.com/news/ for the latest updates.
How to Determine the Correct Bolt Torque
The best torque value is the one specified by the equipment manufacturer, engineering drawing, structural code, or fastener supplier for the exact joint condition. If that information is unavailable, torque can be estimated using established engineering methods.
Start With the Manufacturer’s Specification
For vehicles, pumps, compressors, gearboxes, valves, turbines, engines, and industrial machines, always begin with the manufacturer’s service manual.
Manufacturer torque values may account for:
- Fastener grade
- Joint design
- Thread lubrication
- Gasket compression
- Thermal expansion
- Safety factor
- Required tightening sequence
- Reuse limitations
- Torque-angle procedures
For example, a diesel engine cylinder head bolt may require a specific torque plus angle sequence. A general torque chart is not adequate for that application.
Use Engineering Drawings and Specifications
In manufacturing and fabrication, torque requirements are often listed on:
- Assembly drawings
- Work instructions
- Bill of materials notes
- Quality control documents
- Customer specifications
- Military, aerospace, or automotive standards
Industrial buyers sourcing fasteners should verify that supplied bolts match the drawing requirements for grade, finish, thread pitch, and certification.
Apply the Torque Formula When Appropriate
A simplified torque formula is:
T = K × D × F
Where:
T= torqueK= nut factor or friction coefficientD= nominal bolt diameterF= desired clamp load
This formula is widely used for estimating torque, but it depends heavily on the nut factor. Since friction can vary widely, calculated torque should be validated for critical applications.
Consider the Target Clamp Load
Many bolted joints are designed so the bolt is tightened to a percentage of its proof load or yield strength. A common target for many standard bolted joints is a controlled preload below the fastener’s proof load.
However, not every joint should be tightened to the maximum safe preload. Gaskets, aluminum housings, plastic parts, and delicate assemblies may require lower torque to avoid damage.
Confirm Whether Torque Is for the Bolt or Nut
Some procedures specify tightening the nut while holding the bolt head. Others specify tightening the bolt into a tapped hole. Friction conditions differ between these methods.
For accurate results, follow the procedure exactly.
For those looking to deepen their understanding of mechanical assembly, the article on the gearbox build process offers valuable insights that complement the information found in Bolt Torque Specifications: A Complete Guide. This resource provides a thorough overview of the steps involved in constructing a gearbox, highlighting the importance of precise torque settings to ensure optimal performance and longevity. You can read more about it in the detailed guide available here.
Bolt Grades, Markings, and Strength Identification
Before applying any bolt torque specification, confirm the fastener grade. Using the wrong grade can create a dangerous joint even if the torque wrench reads correctly.
SAE Bolt Head Markings
SAE bolts are commonly identified by radial lines on the bolt head.
| SAE Grade | Head Marking | Typical Use |
|---|---|---|
| Grade 2 | No radial lines | Light-duty general fastening, maintenance, and non-critical assemblies |
| Grade 5 | Three radial lines | Automotive, industrial machinery, agricultural equipment, and general construction |
| Grade 8 | Six radial lines | High-strength mechanical, structural, and heavy equipment applications |
Do not assume that a bolt is high-strength because it looks heavy or has a yellow zinc finish. Always check the markings.
Metric Bolt Property Classes
Metric bolts are usually stamped with numbers such as 8.8, 10.9, or 12.9.
| Metric Class | General Strength Level | Common Use |
|---|---|---|
| 8.8 | Medium-high strength | Industrial machinery, vehicles, and general manufacturing |
| 10.9 | High strength | Heavy equipment, automotive systems, and structural components |
| 12.9 | Very high strength | High-performance machinery, tooling, dies, and other critical clamping applications |
Metric property class markings should be matched with compatible nuts. A high-strength bolt paired with a low-strength nut can strip the nut threads before the bolt reaches proper preload.
Stainless Steel Fastener Markings
Stainless fasteners are often identified by material and property class, such as A2-70 or A4-80.
Stainless steel has different strength and galling characteristics than carbon steel. Torque values for Grade 5 or Grade 8 carbon steel should not be applied to stainless bolts unless verified by the manufacturer or an engineer.
For those looking to deepen their understanding of mechanical specifications, the article on cutoff wheel thickness provides valuable insights that complement the information found in the Bolt Torque Specifications: A Complete Guide. Understanding the nuances of different thicknesses can significantly impact performance and safety in various applications. You can read more about this topic in the related article here.
Torque Tools and Best Practices
Accurate bolt torque specifications require accurate tools and consistent technique. Even the right torque value can produce poor results if the tool is uncalibrated or the joint is dirty.
Common Torque Tools
Contractors, mechanics, and maintenance crews typically use several types of torque tools.
| Tool Type | Best For | Notes |
|---|---|---|
| Click torque wrench | General mechanical work and maintenance | Must be set to the correct torque value and used properly |
| Beam torque wrench | Basic torque verification | Durable, reliable, and easy to maintain, but less convenient to read |
| Digital torque wrench | Precision tightening and data logging | Ideal for quality control and documenting torque values |
| Dial torque wrench | Inspection, testing, and calibration checks | Commonly used to measure running and breakaway torque |
| Hydraulic torque wrench | Large industrial fasteners | Frequently used on flanges, turbines, pipelines, and heavy equipment |
| Torque multiplier | High-torque applications with limited leverage | Requires a properly positioned reaction arm for safe operation |
| Electric or pneumatic torque tool | High-volume production assembly | Often integrated with torque monitoring and quality assurance systems |
Calibration Matters
Torque tools should be calibrated at scheduled intervals based on use, environment, and company quality requirements. A torque wrench dropped from a truck bed or used daily in a shop may need verification sooner than one used occasionally.
Good practices include:
- Store click-type wrenches at the lowest setting, not under load.
- Do not use a torque wrench as a breaker bar.
- Apply force smoothly at the handle grip.
- Stop when the wrench clicks; do not keep pulling.
- Use the correct drive size and socket.
- Keep calibration records for critical work.
Clean Threads Before Tightening
Dirty, rusty, painted, or damaged threads can produce inaccurate torque readings. Much of the applied torque may be consumed by friction instead of creating clamp load.
Before tightening:
- Inspect threads for damage.
- Remove rust, burrs, dirt, and old threadlocker.
- Replace questionable fasteners.
- Chase internal threads when appropriate.
- Confirm nut runs freely before final assembly.
- Apply specified lubricant only if required.
Use the Correct Tightening Sequence
Many joints require a specific tightening pattern to distribute clamp load evenly. This is especially important for flanges, covers, manifolds, wheels, and gasketed joints.
Common tightening patterns include:
- Star pattern for wheels and circular flanges
- Cross pattern for rectangular covers
- Center-out pattern for long housings
- Multi-pass tightening for large or gasketed joints
A typical multi-pass process may include:
- Snug all bolts by hand.
- Tighten to 30% of final torque in sequence.
- Tighten to 60% of final torque in sequence.
- Tighten to 100% of final torque in sequence.
- Perform a final verification pass if specified.
Special Applications for Bolt Torque Specifications
Different industries have different torque requirements. A general fastener chart may be acceptable for non-critical shop work, but many applications require specialized procedures.
Structural Steel Bolting
Structural bolting often follows standards such as those used for high-strength structural bolts in building and bridge applications. Torque alone may not be the preferred control method because friction variation can affect preload.
Common structural bolting methods may include:
- Snug-tight installation
- Turn-of-nut method
- Calibrated wrench method
- Twist-off tension-control bolts
- Direct tension indicators
Contractors working on structural connections should follow project specifications, applicable codes, and inspection requirements.
Flange Bolting and Gasketed Joints
Flange bolt torque specifications are critical in piping, valves, heat exchangers, and process equipment. The torque must compress the gasket enough to seal without crushing it or overstressing the flange.
Factors include:
- Flange class and material
- Gasket type
- Bolt material
- Lubrication
- Operating pressure
- Temperature
- Bolt pattern
- Retorque requirements
For plant maintenance teams, a controlled bolting procedure can reduce leaks, improve startup reliability, and support safe operation.
Automotive and Heavy Equipment
Mechanics frequently encounter torque specifications for:
- Wheel lug nuts
- Cylinder heads
- Main bearing caps
- Connecting rod bolts
- Suspension components
- Brake calipers
- Flywheels
- Axle nuts
- Hydraulic fittings
Some fasteners are torque-to-yield and should not be reused unless the manufacturer permits it. Torque-to-yield fasteners are tightened beyond the elastic range using a torque-plus-angle method to produce consistent clamp load.
Manufacturing and Assembly Lines
Manufacturers need repeatable torque control to maintain product quality. Torque specifications should be documented in work instructions and supported by proper tools.
Quality-focused practices include:
- Tool calibration schedules
- Operator training
- Error-proofing
- Torque verification sampling
- Digital data capture
- Traceability for critical fasteners
- Clear rework procedures
Industrial buyers sourcing assembly tools should evaluate not only maximum torque capacity, but also accuracy, ergonomics, data output, maintenance needs, and compatibility with production requirements.
Stainless Steel and Galling-Prone Fasteners
Stainless steel fasteners are prone to galling, especially when tightened quickly or without lubrication. Galling occurs when threads seize due to friction and material transfer.
To reduce galling risk:
- Use compatible anti-seize when allowed.
- Tighten slowly.
- Avoid impact tools unless approved.
- Use different stainless grades for bolt and nut where appropriate.
- Replace galled fasteners immediately.
- Follow stainless-specific torque values.
Inch-Pounds, Foot-Pounds, and Newton-Meters Conversion
Misreading units is a common and costly torque mistake. Always verify whether the specification is in in-lb, ft-lb, or N·m.
Common Torque Conversions
| Conversion | Formula |
|---|---|
| ft-lb to in-lb | Multiply by 12 |
| in-lb to ft-lb | Divide by 12 |
| ft-lb to N·m | Multiply by 1.356 |
| N·m to ft-lb | Multiply by 0.7376 |
| in-lb to N·m | Multiply by 0.113 |
| N·m to in-lb | Multiply by 8.851 |
Example Conversion
If a specification calls for 80 ft-lb:
80 × 12 = 960 in-lb80 × 1.356 = 108.5 N·m
If a metric manual lists 120 N·m:
120 × 0.7376 = 88.5 ft-lb
Always use a torque wrench that operates comfortably within the required range. A large 250 ft-lb wrench may not be ideal for a 15 ft-lb fastener.
Common Bolt Torque Mistakes to Avoid
Even experienced professionals can make torque-related errors under time pressure. The following mistakes are common in field service, maintenance shops, fabrication plants, and construction sites.
Using a General Chart for a Critical Joint
Torque charts are references, not universal answers. Critical applications should follow the OEM manual, engineering specification, or applicable standard.
Examples where general charts are not enough include:
- Engine internals
- Pressure flanges
- Crane components
- Structural connections
- Safety-critical vehicle parts
- Aerospace assemblies
- High-temperature equipment
Ignoring Lubrication Conditions
A bolt torqued to a dry specification with anti-seize on the threads may be over-tightened. A bolt torqued to a lubricated specification while dry may be under-tightened.
Always match the torque value to the specified thread condition.
Reusing Damaged or Stretched Bolts
Bolts that have yielded, corroded, galled, or suffered thread damage may not produce reliable clamp load. Reusing questionable fasteners can lead to joint failure even when torque appears correct.
Replace bolts when:
- Threads are visibly damaged
- The shank is necked down
- The head is rounded
- Corrosion is significant
- The fastener is torque-to-yield and marked non-reusable
- The manufacturer requires replacement
Mixing Bolt Grades
Using mixed grades in the same joint can create uneven load distribution. A lower-grade bolt may stretch more or fail before higher-grade fasteners reach their intended preload.
For critical assemblies, all fasteners should match the specified grade, size, finish, and thread pitch.
Using Impact Tools for Final Torque
Impact tools are useful for removal and rundown, but they are not a substitute for a calibrated torque tool unless specifically designed and validated for controlled tightening.
Best practice is to snug bolts with an impact or power tool when appropriate, then apply final torque with a calibrated torque wrench or controlled torque system.
How Industrial Buyers Should Specify Bolts and Torque Requirements
Industrial buyers and procurement teams play an important role in torque reliability. A purchasing decision based only on price can create hidden risk if fasteners do not meet material, grade, coating, or certification requirements.
Specify the Complete Fastener Requirement
A complete fastener specification should include:
- Diameter and length
- Thread pitch
- Grade or property class
- Material
- Finish or coating
- Head style
- Nut and washer requirements
- Applicable standard
- Certification requirements
- Lot traceability, if needed
- Packaging and labeling requirements
For example, “1/2-inch bolt” is not enough information. A better specification would identify the exact diameter, thread, grade, length, finish, and standard.
Match Coatings to the Application
Coatings affect corrosion resistance and torque-tension behavior. Common options include:
- Plain steel
- Zinc plating
- Hot-dip galvanizing
- Black oxide
- Phosphate and oil
- Mechanical galvanizing
- PTFE or other low-friction coatings
- Stainless steel
If a coating changes friction, the torque specification may need adjustment.
Require Documentation for Critical Fasteners
For safety-critical, structural, pressure-containing, or high-value equipment, buyers may require:
- Material test reports
- Certificates of conformance
- Heat lot traceability
- Plating certifications
- Mechanical property verification
- Country-of-origin documentation
- Compliance with applicable standards
Practical Bolt Torque Examples
Real-world examples help show why bolt torque specifications must be application-specific.
Example 1: Wheel Lug Nuts
A mechanic installing wheels should use the vehicle manufacturer’s lug nut torque specification, not a generic chart. The correct torque depends on stud size, wheel material, seat style, and hub design.
Best practice:
- Clean wheel studs and mating surfaces.
- Hand-start lug nuts.
- Snug in a star pattern.
- Lower the vehicle enough to prevent rotation.
- Torque in stages using a calibrated wrench.
- Recheck if required by the manufacturer or fleet policy.
Example 2: Pump Flange Bolting
A maintenance technician replacing a pump gasket must consider flange class, gasket type, bolt material, and lubricant. Uneven torque can cause leaks or flange distortion.
Best practice:
- Inspect flange faces.
- Replace damaged fasteners.
- Apply specified lubricant.
- Use the correct gasket.
- Tighten in a cross pattern.
- Use multiple torque passes.
- Verify final torque after gasket seating if specified.
Example 3: Aluminum Housing Assembly
A manufacturer assembling a gearbox with aluminum housings must avoid stripping threads. A high-strength bolt does not mean high torque is safe for the tapped aluminum hole.
Best practice:
- Use engineering-approved torque values.
- Consider thread inserts for repeated service.
- Use washers where specified.
- Control driver speed.
- Validate torque with quality checks.
Example 4: Structural Steel Connection
A contractor installing high-strength structural bolts must follow project specifications. The inspector may require a defined installation method, not just a torque wrench reading.
Best practice:
- Use specified bolts, nuts, and washers.
- Confirm bolt lot documentation.
- Follow snug-tight or pretensioning requirements.
- Use approved inspection methods.
- Record installation data when required.
Quick Reference: Bolt Torque Specification Checklist
Before tightening any important fastener, review this checklist:
- Confirm bolt size and thread pitch.
- Identify grade or property class.
- Verify nut and washer compatibility.
- Check whether threads are dry, lubricated, coated, or treated.
- Clean and inspect all threads.
- Replace damaged or questionable fasteners.
- Confirm the correct torque unit.
- Use a calibrated torque tool.
- Follow the specified tightening sequence.
- Apply torque in stages when required.
- Document results for critical work.
- Follow OEM, engineering, or code requirements over general charts.
Frequently Asked Questions About Bolt Torque Specifications
What happens if a bolt is over-torqued?
An over-torqued bolt can stretch beyond its elastic limit, weaken, crack, or break. Over-torque can also strip threads, crush gaskets, distort flanges, damage aluminum housings, or create unsafe stress in the joint.
What happens if a bolt is under-torqued?
An under-torqued bolt may not create enough clamp load. The joint can loosen under vibration, leak under pressure, shift under load, or fatigue over time.
Can I reuse bolts after torquing them?
It depends on the application and fastener type. Standard bolts may be reusable if they are undamaged and have not yielded. Torque-to-yield bolts, heavily corroded bolts, galled stainless fasteners, and critical fasteners may require replacement.
Should torque specs be used dry or lubricated?
Use the condition specified by the manufacturer or engineering document. If the spec says dry, do not lubricate unless approved. If it says lubricated, use the specified lubricant.
Are stainless steel bolt torque specifications different?
Yes. Stainless steel fasteners often have different strength and friction characteristics than carbon steel bolts. They are also more prone to galling. Use stainless-specific torque values and lubrication guidance.
Is torque the most accurate way to measure bolt tension?
Torque is common and practical, but it is not the most direct measure of bolt tension because friction can vary. More accurate methods may include bolt stretch measurement, ultrasonic tension measurement, direct tension indicators, or hydraulic tensioning.
Conclusion: Use Bolt Torque Specifications as a Reliability Tool
Bolt torque specifications are more than numbers on a chart. They are a practical tool for controlling clamp load, protecting equipment, preventing leaks, improving safety, and reducing costly downtime.
For contractors, maintenance professionals, manufacturers, mechanics, and industrial buyers, the best approach is straightforward: identify the fastener, verify the joint requirements, use the correct torque value for the actual thread condition, and apply it with calibrated tools and proper technique.
When in doubt, follow the OEM manual, engineering specification, or applicable industry standard before relying on a general torque chart. For critical applications, consult a qualified engineer or fastener specialist.
If your team needs reliable fasteners, torque tools, lubricants, or technical support, review your current bolting procedures and source components from suppliers who can provide the right specifications, documentation, and application guidance. Correct torque starts with the right information—and the right hardware.