
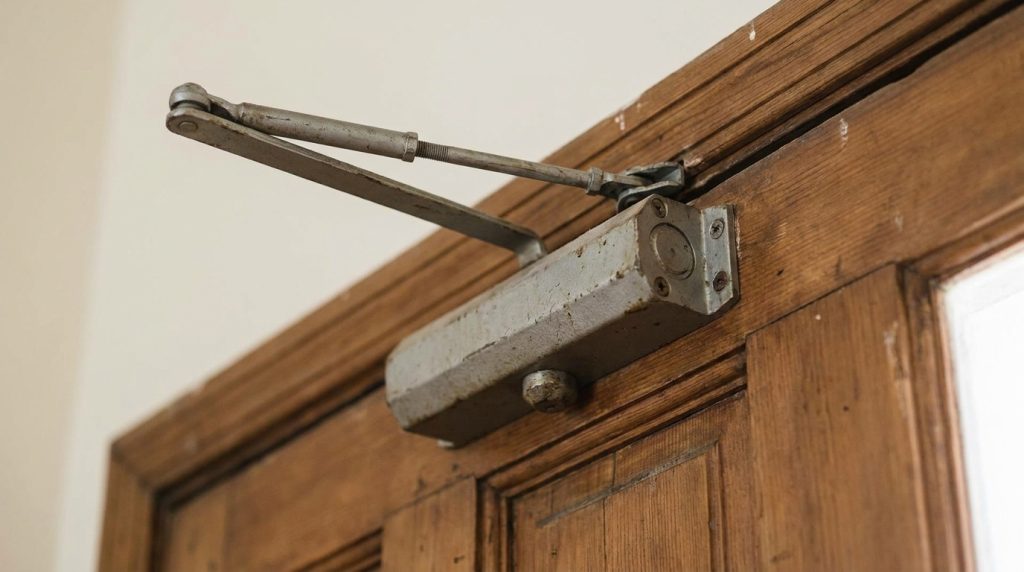
A properly installed door closer helps doors close smoothly, quietly, and securely after every use. Whether you’re replacing a worn-out unit or installing a new closer on a residential, commercial, or industrial door, the right installation improves safety, protects the door and frame, reduces wear, and helps maintain security.
Most surface-mounted door closers can be installed with common hand tools in less than two hours. This guide walks you through selecting the right closer, installing it correctly, making adjustments, and troubleshooting common issues.
What Is a Door Closer?
A door closer is a mechanical device that automatically closes a door after it has been opened.
Most door closers use:
- Spring tension
- Hydraulic damping
- Adjustable valves
Together, these components allow the door to close at a controlled speed instead of slamming shut.
Benefits of Installing a Door Closer
A quality door closer offers several advantages:
- Prevents doors from slamming
- Improves building security
- Reduces wear on hinges
- Protects the door frame
- Helps maintain indoor temperatures
- Reduces noise
- Improves accessibility
- Extends door life
- Supports fire door operation
Properly adjusted door closers also reduce maintenance costs over time.
Common Applications
Door closers are commonly installed on:
- Commercial buildings
- Offices
- Schools
- Retail stores
- Warehouses
- Apartment buildings
- Industrial facilities
- Churches
- Community centers
- Residential entry doors
Fire-rated doors almost always require properly functioning door closers.
Signs It’s Time to Replace a Door Closer
Common symptoms include:
- Door slams shut
- Door won’t latch
- Oil leaking from closer body
- Bent closer arm
- Loose mounting hardware
- Grinding or squeaking
- Door closes too slowly
- Door won’t stay aligned
- Hydraulic fluid leakage
- Broken adjustment screws
Once hydraulic fluid begins leaking, replacement is usually the best solution.
Types of Door Closers
Several styles are available.
Surface-Mounted Door Closers
The most common style.
Advantages include:
- Easy installation
- Affordable
- Widely available
- Easy maintenance
Parallel Arm Closers
Common in commercial buildings.
Advantages:
- Less exposed hardware
- Better vandal resistance
- Clean appearance
Top Jamb Closers
Typically used when the closer mounts to the frame rather than the door.
Concealed Door Closers
Installed inside the door or frame.
Advantages:
- Hidden appearance
- Modern aesthetics
Installation is considerably more complex than surface-mounted models.
Choosing the Right Door Closer
Before purchasing, consider:
- Door width
- Door weight
- Interior or exterior use
- Traffic level
- Fire rating
- Wind exposure
- Accessibility requirements
- Mounting style
Many commercial closers feature adjustable spring power to accommodate different door sizes.
Tools You’ll Need
Gather your tools before starting:
- Cordless drill
- Screwdriver set
- Drill bits
- Tape measure
- Pencil
- Carpenter’s level
- Adjustable wrench
- Socket set
- Center punch
- Safety glasses
- Step ladder
Most new closers include:
- Mounting template
- Screws
- Arm assembly
- Mounting bracket
- Installation instructions
Step 1: Remove the Old Door Closer
If replacing an existing unit:
- Open the door.
- Support the closer arm.
- Remove mounting screws.
- Remove the arm assembly.
- Remove the closer body.
Inspect both the door and frame for damage.
Repair stripped screw holes before installing the new closer.
Step 2: Inspect the Door
Before installing the new closer, verify that:
- Hinges are tight
- Door swings freely
- Door doesn’t bind
- Frame is square
- Latch aligns correctly
A door closer cannot compensate for a badly misaligned door.
Step 3: Position the Template
Most manufacturers include a paper drilling template.
Tape it securely to the door.
Verify:
- Handing
- Mounting style
- Alignment
- Hole locations
Double-check measurements before drilling.
Step 4: Drill Pilot Holes
Using the template:
Mark all hole locations.
Drill pilot holes using the recommended drill bit.
Pilot holes improve screw alignment and reduce splitting in wooden doors.
Step 5: Install the Closer Body
Attach the closer body using the supplied hardware.
Start all screws before tightening.
Tighten evenly.
Avoid overtightening.
Verify that the adjustment valves are positioned according to the manufacturer’s instructions.
Step 6: Install the Arm Bracket
Attach the arm bracket to:
- Door frame
- Door
- Mounting plate
Depending on the installation method.
Keep the bracket square.
Secure all fasteners tightly.
Step 7: Connect the Closer Arm
Attach the arm assembly.
Many closers require slight preload during installation.
Follow the manufacturer’s instructions carefully.
Improper arm geometry can prevent proper operation.
Step 8: Test Door Operation
Open the door fully.
Allow it to close naturally.
Observe:
- Closing speed
- Latching speed
- Door alignment
- Smooth operation
- Arm movement
Most new closers require adjustment.
Adjusting Closing Speed
The main closing valve controls most of the closing cycle.
If the door:
Closes too quickly
Turn the adjustment valve slightly to slow it.
Closes too slowly
Turn the valve slightly to increase speed.
Only make small adjustments.
Approximately one-eighth turn at a time.
Never remove adjustment screws completely.
Adjusting Latching Speed
The latch valve controls the final few inches before the door closes.
Proper adjustment allows the door to:
- Close securely
- Latch completely
- Avoid slamming
Fine-tune until the door closes firmly but quietly.
Backcheck Adjustment
Some closers include backcheck.
Backcheck slows the door when opened aggressively.
Useful for:
- Exterior doors
- Windy entrances
- High-traffic buildings
Avoid excessive backcheck force, which makes the door difficult to open.
Delayed Action
Some commercial closers include delayed action.
This feature briefly slows closing to allow:
- Deliveries
- Wheelchair access
- Equipment movement
- Higher pedestrian traffic
Adjust according to manufacturer specifications.
Common Installation Problems
Door Slams Shut
Possible causes:
- Closing speed too fast
- Low hydraulic resistance
- Incorrect adjustment
Door Won’t Latch
Check:
- Latching speed
- Strike plate alignment
- Door hinges
- Closer arm adjustment
Door Is Hard to Open
Possible causes:
- Spring tension too high
- Incorrect closer size
- Excessive backcheck
Oil Leaking
Hydraulic fluid leakage usually indicates seal failure.
Replacement is generally recommended.
Arm Binds During Operation
Inspect:
- Mounting position
- Arm length
- Door alignment
- Installation template
Improper arm geometry is a common installation error.
Maintaining Your Door Closer
Inspect periodically for:
- Loose screws
- Oil leaks
- Bent arms
- Door alignment
- Smooth operation
- Rust
Retighten hardware as needed.
Minor seasonal adjustments may be necessary because hydraulic fluid responds to temperature changes.
Common Mistakes to Avoid
Using the wrong mounting template
Overtightening adjustment screws
Ignoring door alignment
Installing the closer backwards
Using undersized hardware
Failing to preload the arm correctly
Ignoring fire door requirements
Skipping final adjustments
Most installation problems can be avoided by carefully following the manufacturer’s instructions.
When to Call a Professional
Professional installation may be appropriate for:
- Fire-rated doors
- Automatic doors
- Heavy commercial doors
- Glass storefront doors
- ADA accessibility requirements
- Concealed door closers
- Damaged door frames
These applications often require specialized hardware and code compliance.
Related Articles
Continue improving your facility with these helpful guides:
- Repair a Broken Gate Hinge
- Replace a Hydraulic Hose
- Build Heavy-Duty Shop Shelves
- How to Replace Trailer Lights
- Essential PPE for Construction and Industrial Work
Frequently Asked Questions
Can I install a door closer myself?
Yes. Most surface-mounted door closers are designed for straightforward installation using common hand tools.
Why won’t my door latch after installing the closer?
The latching speed may need adjustment, or the door may be slightly misaligned with the strike plate.
How long should a door closer last?
Quality commercial door closers often last 10 to 20 years or more, depending on usage and maintenance.
Why is hydraulic fluid leaking from my door closer?
Hydraulic oil leakage usually indicates failed internal seals. In most cases, replacing the closer is more practical than attempting repairs.
How often should door closers be inspected?
Commercial facilities should inspect door closers several times each year, while residential installations should be checked annually for proper operation and loose hardware.
Keep Your Doors Operating Smoothly
A properly installed door closer improves safety, reduces wear, protects your building, and ensures doors close consistently after every use. By selecting the correct closer, following proper installation procedures, and making precise adjustments, you can enjoy years of dependable performance with minimal maintenance.
Whether you’re maintaining a commercial facility, industrial building, warehouse, office, or home, CEM Industrial Supply offers the tools, fasteners, safety equipment, adhesives, and maintenance products you need to complete every installation with confidence.