
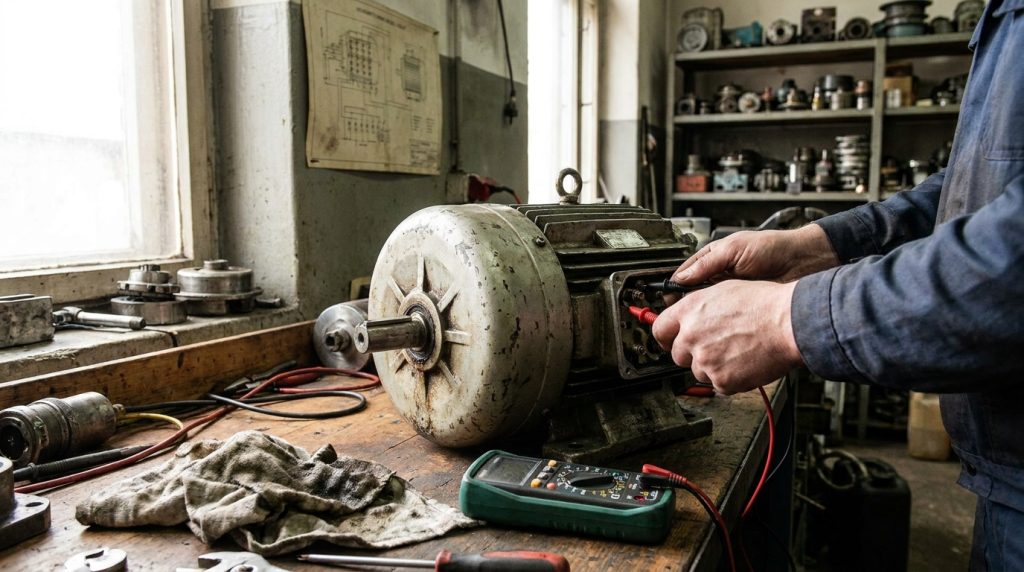
Why Testing Electric Motors is Crucial Before Replacement
Electric motors are the workhorses of modern industry, powering everything from conveyor belts and pumps to HVAC systems and specialized machinery. When an electric motor fails, it can bring production to a grinding halt, leading to significant downtime and lost revenue. For industrial maintenance technicians, plant managers, electricians, contractors, and equipment owners, the immediate reaction is often to consider replacement. However, jumping to a replacement decision without thorough diagnostic testing can be a costly mistake. This article will guide you through the essential steps of testing an electric motor before committing to a replacement, helping you save time, money, and ensure your operations run smoothly. Understanding the health of your electric motors and implementing proper preventative maintenance can drastically extend their lifespan and prevent unexpected failures.
If you’re looking to gain a deeper understanding of electric motors and their maintenance, you might find the article on welding services at Cem Industrial Supply particularly useful. It provides insights into various industrial applications, including how to effectively service and maintain electric motors. For more information, you can read the article here: Cem Industrial Supply Welding Services.
Understanding Electric Motor Operation and Common Failure Modes
Before diving into testing procedures, a foundational understanding of how electric motors function and the typical reasons they fail is beneficial. This knowledge empowers you to interpret test results more effectively and identify potential issues accurately.
How Electric Motors Work: A Simplified Overview
Most industrial applications utilize AC induction motors. These motors operate on the principle of electromagnetic induction. When an AC current flows through the stator windings, it creates a rotating magnetic field. This rotating field induces a current in the rotor’s conductors, which then generates its own magnetic field. The interaction between the stator’s rotating magnetic field and the rotor’s induced magnetic field creates torque, causing the rotor to spin.
Key components include:
- Stator: The stationary outer part of the motor containing windings that create the rotating magnetic field.
- Rotor: The rotating inner part of the motor, typically a squirrel cage design (conductive bars shorted at the ends) or a wound rotor.
- Bearings: Support the rotor and allow it to spin smoothly.
- Shaft: Transmits the motor’s rotational power to the driven equipment.
- Frame: Houses and protects the internal components.
- Terminal Box: Contains the electrical connections for power supply and motor control.
Common Causes of Electric Motor Failure
Understanding why motors fail is the first step in diagnosing them. Here are some of the most frequent culprits:
- Bearing Failure: This is one of the most common causes of motor failure. Overloading, insufficient lubrication, contamination (dirt, moisture), improper installation, and general wear and tear can lead to bearing damage. Symptoms include excessive noise, vibration, heat, and seized rotors.
- Winding Failures (Shorts and Opens): The motor windings are crucial for generating the magnetic field.
- Shorts: Can occur between windings, within a winding (turn-to-turn short), or to ground. Caused by insulation breakdown due to overheating, vibration, moisture, or manufacturing defects. Symptoms include increased current draw, overheating, and reduced torque.
- Opens: A break in the winding circuit. Can be caused by loose connections, vibration, or severe overheating. Symptoms include the motor not starting, reduced power, or erratic operation.
- Overheating: Excessive heat is a motor’s worst enemy. It degrades insulation, damages bearings, and can lead to winding failures. Causes include:
- Overloading: The motor is working harder than its rated capacity.
- Low Voltage/High Voltage: Unstable power supply.
- Poor Ventilation: Obstructed air vents or high ambient temperatures.
- Bearing Issues: Increased friction leads to heat.
- Frequent Starts/Stops: Especially under load.
- Mechanical Issues:
- Misalignment: When the motor shaft is not perfectly aligned with the driven equipment shaft, it puts stress on bearings and couplings, leading to premature failure.
- Shaft Damage: Bent or broken shafts are often a result of severe mechanical shock or seizing.
- Loose Mountings: Vibration and stress on the motor and driven equipment.
- Contamination: Dirt, dust, moisture, and corrosive chemicals can ingress into the motor, damaging windings, bearings, and internal components.
- Electrical Problems: Issues with the power supply, control systems, or improper wiring can cause significant damage.
Essential Tools and Safety Precautions for Electric Motor Testing
Before you begin any testing, ensure you have the right tools and prioritize safety. Working with electrical equipment can be dangerous if proper precautions are not taken.
Essential Diagnostic Tools
A well-equipped technician will have the following tools readily available:
- Multimeter (Digital): Essential for measuring voltage, current, and resistance. Ensure it has adequate voltage and current ratings for the motor you are testing.
- Megohmmeter (Megger): Specifically designed to measure insulation resistance between windings and ground, or between windings. This is critical for detecting insulation degradation.
- Clamp Meter: Used to measure current without breaking the circuit. Essential for checking motor load and identifying imbalances.
- Tachometer: Measures rotational speed (RPM). Useful for verifying motor performance and diagnosing issues related to speed.
- Stethoscope (Mechanical): A simple but effective tool for listening to bearing noise and identifying mechanical issues.
- Vibration Analyzer (Optional but Recommended): Provides a more detailed analysis of vibration patterns, which can pinpoint bearing problems, imbalance, and misalignment.
- Infrared (IR) Camera (Optional but Recommended): Useful for detecting overheating components (bearings, connections) remotely.
- Basic Hand Tools: Wrenches, screwdrivers, socket sets for disassembling guards and accessing connections.
- Personal Protective Equipment (PPE): Safety glasses, insulated gloves, flame-resistant clothing, and safety shoes.
Critical Safety Precautions
Always prioritize safety when working with electric motors.
- Lockout/Tagout (LOTO): This is non-negotiable. Before commencing any work, ensure the power supply to the motor is de-energized and locked out using approved LOTO procedures. Verify zero energy state using a voltmeter at the motor terminals.
- Wear Appropriate PPE: Always wear safety glasses, insulated gloves rated for the voltage you are working with, and flame-resistant clothing.
- Understand the Circuit: Before testing, familiarize yourself with the motor’s wiring diagram and the associated control circuit.
- Assume All Circuits are Live: Until proven otherwise through proper testing, treat all conductors as potentially energized.
- Never Work Alone: If possible, have another qualified person present who can assist and provide emergency support.
- Discharge Capacitors: If the motor circuit includes capacitors (e.g., single-phase motors), ensure they are safely discharged before testing.
- Be Aware of Moving Parts: Even after power is off, be mindful of residual momentum in driven equipment.
- Proper Tool Usage: Use insulated tools whenever possible. Ensure your multimeter leads and probes are in good condition.
- Environmental Hazards: Be aware of any environmental hazards such as wet conditions, flammable materials, or confined spaces.
Step-by-Step Diagnostic Testing Procedures
This section outlines the common electrical and mechanical tests you can perform to diagnose electric motor issues.
Visual Inspection and Preliminary Checks
Before touching any tools, a thorough visual inspection can reveal obvious problems.
- Power Supply: Check for loose or damaged power cables, fuses, circuit breakers, and disconnects.
- Motor Exterior: Look for physical damage, signs of overheating (discoloration), corrosion, or ingress of dirt and debris. Check ventilation slots – are they clear?
- Mounting: Ensure the motor is securely mounted and not vibrating excessively on its base. Check for loose bolts.
- Shaft and Coupling: Inspect the shaft for signs of damage or bending. Examine the coupling between the motor and driven equipment for wear or damage.
- Bearings: Listen for unusual noises (grinding, squealing) when the motor is running (briefly, if safe to do so, or by rotating the shaft by hand). Feel for excessive play.
- Connections: Open the terminal box and inspect all electrical connections for looseness, corrosion, or signs of overheating (melted insulation, discoloration).
Electrical Testing with a Multimeter
A multimeter is your first line of defense for electrical diagnostics.
Checking for Open Windings (Resistance Test)
This test identifies breaks in the motor windings.
- De-energize and LOTO the motor.
- Disconnect all power leads from the motor terminals.
- Set your multimeter to the resistance (Ohms, Ω) setting. Ensure the range is appropriate for motor windings (often a few Ohms for larger motors, up to several kOhms for smaller ones).
- Test each winding individually. For a three-phase motor, you’ll have three sets of windings (often U, V, W or T1, T2, T3). Measure the resistance between U and V, V and W, and W and U.
- For a single-phase motor: Measure resistance between the main winding and the start winding (if accessible and distinguishable), and between each winding and ground.
- Interpreting Results:
- Good: You should get a low, consistent resistance reading for each winding pair. The readings between phases should be very close (within 5-10% of each other).
- Open Winding: An infinite resistance reading (OL or similar on the display) indicates a broken winding.
- High Resistance: Can indicate loose connections or partially broken wires.
Checking for Short-to-Ground (Resistance Test)
This test detects if a winding is making contact with the motor frame.
- De-energize and LOTO the motor.
- Disconnect all power leads from the motor terminals.
- Set your multimeter to the resistance (Ohms, Ω) setting. Use a high resistance range if available.
- Measure the resistance between each winding lead (U, V, W) and the motor frame (ground).
- Interpreting Results:
- Good: You should get a very high resistance reading (ideally infinite or above the meter’s range).
- Short-to-Ground: A low resistance reading indicates a short to the motor frame. This is a critical fault requiring immediate attention.
Checking for Turn-to-Turn Shorts (Resistance Test – Limited Scope)
Detecting subtle turn-to-turn shorts with a basic multimeter can be challenging and often requires more advanced equipment. However, significant shorts might manifest as an imbalance in resistance readings between windings that should be identical. If your resistance readings between winding pairs are significantly different (e.g., one is much lower than the others), it strongly suggests a short.
Insulation Resistance Testing (Megger Test)
This is arguably the most important test for assessing the health of a motor’s insulation system. A megohmmeter applies a high DC voltage to test the insulation’s ability to withstand electrical stress.
- De-energize and LOTO the motor.
- Disconnect all power leads from the motor terminals.
- Connect the megohmmeter leads:
- One lead to one of the motor’s winding terminals.
- The other lead to the motor frame (ground).
- Apply the test voltage. The appropriate test voltage depends on the motor’s rated voltage (e.g., 500V DC for motors up to 1000V). Consult the megohmmeter’s manual or motor manufacturer recommendations.
- Read the insulation resistance.
- Spot Readings: Take a reading at a specific point in time.
- Polarization Index (PI): For a more thorough assessment, take readings at 30 seconds and 10 minutes, then calculate the ratio (10-minute reading / 30-second reading). A PI of 2.0 or higher is generally considered good for most industrial motors.
- Interpreting Results:
- Good: High resistance readings (typically in megaohms, MΩ) indicate healthy insulation. General guidelines suggest insulation resistance should be at least 1 MΩ per kV of motor rating, plus 1 MΩ (e.g., for a 480V motor, > 1 MΩ is a minimum).
- Degraded Insulation: Low readings (e.g., below 1 MΩ) indicate insulation breakdown, moisture ingress, or contamination. This can lead to shorts to ground and potential failure.
- Short to Ground: An instantaneous reading close to zero indicates a direct short to ground.
Mechanical Testing and Analysis
Electrical tests might indicate a problem, but mechanical issues often contribute to or are the root cause of electrical failures.
Bearing Noise and Vibration Analysis
- Listen with a Stethoscope: With the motor running (briefly and safely, if possible, or by manually rotating the shaft), place the stethoscope probe on the bearing housing. Listen for grinding, rumbling, squealing, or clicking sounds. These are indicative of bearing damage.
- Feel for Play: If the motor is stopped, gently try to wiggle the shaft up and down and side-to-side at the bearing. Excessive play suggests worn bearings.
- Vibration Analysis: If you have a vibration analyzer, take readings at the motor bearing housings. Specific vibration frequencies and amplitudes can help pinpoint bearing defects (e.g., spalling, brinelling) and other mechanical issues.
Shaft Alignment
Misalignment is a significant cause of premature bearing failure and can stress motor couplings.
- Visual Inspection: Look for signs of excessive wear on the coupling, or if the motor and driven equipment shafts appear out of line.
- Dial Indicator or Laser Alignment: For accurate alignment, use dial indicators or a laser alignment system. These tools measure the relative position and angle of the motor and driven equipment shafts and guide the shimming and foot adjustment process.
Load Testing (Where Applicable and Safe)
If the motor is running but underperforming, a load test can provide valuable insight.
- Use a Clamp Meter: Measure the current draw on each phase while the motor is operating under its normal load.
- Compare to Nameplate Data: Compare the measured current to the full-load amperage (FLA) listed on the motor’s nameplate.
- Interpreting Results:
- High Current Draw: Suggests the motor is overloaded, there’s an issue with the driven equipment, or the motor is internally faulty (e.g., shorted windings).
- Low Current Draw: Can indicate the motor is not under sufficient load, or it’s not running at the expected speed.
- Current Imbalance: Significant differences in current between phases (more than 5-10%) can indicate winding issues or problems with the power supply.
When considering the maintenance of your electric motor, it’s essential to understand not just how to test it before replacement, but also the broader context of equipment management. For those interested in optimizing their operations, exploring warehouse management strategies can be incredibly beneficial. You can find valuable insights in this article about mastering warehouse management, which can help you streamline processes and improve overall efficiency in your facility.
Troubleshooting Common Electric Motor Problems
This section applies the testing procedures to diagnose specific issues.
Motor Fails to Start
- Check Power Supply: Is there voltage at the disconnect? At the motor terminals (after LOTO verification)?
- Check Control Circuit: Are control relays, contactors, or overload elements functioning?
- Test Windings (Resistance):
- Open Winding: Leads to no start or intermittent operation. Test resistance between terminals.
- Short to Ground: May trip breaker immediately or prevent starting. Test resistance to ground.
- Check Start Capacitor (Single-Phase): If applicable, test capacitor for capacitance value and shorts.
- Bearings Seized: Try to rotate the shaft by hand. If it’s stuck, it’s likely a bearing or mechanical issue.
Motor Runs Hot
- Check Load: Is the motor overloaded? Use a clamp meter to check current draw.
- Check Ventilation: Are air vents clear? Is the ambient temperature too high?
- Bearing Issues: Listen for noise, feel for roughness. Overheating bearings draw excess current.
- Low Voltage/High Voltage: Check supply voltage.
- Winding Issues: Shorted windings will cause overheating. Check resistance and megger readings.
- Frequent Starts/Stops: If the application requires frequent starting, the motor may be undersized or require a different motor type.
Motor Runs Noisy
- Bearing Noise: Use a stethoscope to pinpoint noisy bearings. Grinding, squealing, or knocking sounds are common.
- Rotor Rubbing: Listen for a scraping sound, which could indicate a bent shaft or damaged rotor.
- Loose Mountings: Check for vibration and loose bolts.
- Imbalance: Uneven load distribution or internal imbalance can cause noise and vibration.
Motor Loses Power or Runs Slowly
- Overloading: Check current draw.
- Low Voltage: Verify supply voltage.
- Bearing Issues: Increased friction requires more torque, leading to speed loss.
- Winding Problems: Partially shorted windings or poor connections can reduce torque.
- Mechanical Binding: Is the driven equipment binding?
Prevention and Maintenance for Extended Motor Life
Proactive maintenance is far more cost-effective than reactive repairs. Implementing a robust preventative maintenance program can significantly extend the life of your electric motors and reduce costly downtime.
Regular Inspections and Lubrication
- Scheduled Visual Inspections: Incorporate motor inspections into your regular maintenance checklists. Look for dust buildup, leaks, unusual noises, and vibrations.
- Lubrication: Follow manufacturer recommendations for the type of lubricant and lubrication schedule. Over- or under-lubrication can both cause bearing damage.
- Example: For many standard industrial motors, re-greasing every 6-12 months with the correct type and amount of high-quality grease is sufficient. Always consult the motor’s data plate or manual.
- Cleanliness: Keep motor exteriors and ventilation areas clean and free of debris.
Electrical System Maintenance
- Verify Power Quality: Regularly check supply voltage and frequency for stability. Unstable power can damage motors.
- Inspect Connections: Periodically check and tighten electrical connections in the terminal box and control panels.
- Grounding: Ensure all motors are properly grounded to prevent electrical hazards and help dissipate static charges.
Mechanical System Maintenance
- Alignment: Regularly check and maintain proper shaft alignment between the motor and driven equipment. Laser alignment services offer precise and efficient solutions.
- Coupling Inspection: Inspect couplings for wear, cracks, or damage during scheduled maintenance.
- Vibration Monitoring: Implement a vibration monitoring program, especially for critical equipment. Early detection of bearing wear or imbalance through vibration analysis can prevent catastrophic failures.
Load Management
- Avoid Overloading: Ensure motors are not consistently operating at or above their nameplate capacity. If a motor is frequently overloaded, consider replacement with a larger or more suitable motor.
- Soft Starters and VFDs: For applications with high starting torque requirements or frequent starts/stops, consider using soft starters or Variable Frequency Drives (VFDs). These devices can reduce mechanical stress and electrical transients during startup.
When to Consider Electric Motor Replacement
Even with diligent testing and maintenance, electric motors have a finite lifespan. Several factors indicate it’s time to consider replacement:
- Repeated Failures: If a motor fails multiple times in quick succession, it might be more cost-effective to replace it.
- Extensive Internal Damage: If electrical tests reveal severe winding damage (multiple shorts, burned insulation) or mechanical tests show significant damage to the rotor or shaft, repair might not be economically viable.
- Age and Obsolescence: Very old motors may be less efficient, harder to source parts for, and their insulation may be inherently degraded. Obsolete motor designs might be replaced by more energy-efficient modern alternatives.
- Cost-Benefit Analysis: Compare the cost of extensive repairs (including downtime) versus the cost of a new, potentially more efficient, and reliable motor.
When replacing a motor, ensure the new motor has the correct:
- Horsepower (HP) or Kilowatts (kW)
- Voltage
- Frame Size and Mounting Dimensions
- Service Factor
- Enclosure Type (e.g., TEFC, ODP)
- Efficiency Rating (consider premium efficiency motors for long-term energy savings)
For assistance with motor selection and replacement, consider expert guidance.
Frequently Asked Questions About Electric Motor Testing
Q1: How often should I perform insulation resistance tests on my electric motors?
A1: The frequency of insulation resistance testing depends on the motor’s criticality, operating environment, and manufacturer recommendations. For critical motors, testing should be done quarterly or semi-annually. For less critical motors in clean environments, annual testing is often sufficient. Always document your readings to track trends.
Q2: What is the difference between resistance testing and megger testing?
A2: Resistance testing, typically done with a multimeter, measures the normal resistance of the winding circuits. It’s useful for detecting open circuits or significant shorts. Megger testing, using a megohmmeter, applies a high voltage to stress the insulation and measures the resistance to ground or between windings. It’s specifically designed to assess the integrity and health of the insulation system, which is crucial for preventing shorts to ground.
Q3: My motor is making a humming noise but not starting. What could be the cause?
A3: A humming noise without rotation often indicates that the motor is receiving power but is unable to start or overcome its starting load. Common causes include:
- A seized rotor due to bearing failure.
- A faulty start winding or capacitor in single-phase motors.
- A severe winding short that prevents the motor from developing starting torque.
- An external mechanical obstruction preventing the driven equipment from moving.
Q4: Can I test a motor while it’s still connected to the load?
A4: Some tests, like checking voltage at the terminals or using a clamp meter for current draw, can be performed with the motor connected to the load, but only after ensuring proper safety procedures like LOTO are followed for the power supply. However, detailed resistance, continuity, and insulation resistance tests must be performed with the motor completely disconnected from the power source and control circuitry to ensure accurate readings and prevent damage to your test equipment or personal injury.
Q5: What if my motor resistance readings are slightly different between phases?
A5: Small variations (within 5-10%) in resistance readings between phases of a three-phase motor are often acceptable and can be due to manufacturing tolerances. However, if the difference is significant (e.g., one phase reading is much lower or higher than the others), it strongly suggests an issue like a partial short circuit within that winding or a poor connection. This warrants further investigation.
Conclusion: Expertise You Can Trust at CEM Industrial Supply
Navigating the complexities of electric motor diagnostics and repair can be challenging. Before you invest in a costly replacement, understanding and performing these diagnostic tests can save your operation significant resources. Whether you suspect bearing failure, winding issues, or a more complex electrical problem, thorough testing is the key to making informed decisions.
At CEM Industrial Supply in Coldwater, Michigan, we understand the critical role electric motors play in your business. Our experienced technicians specialize in comprehensive electric motor repair and diagnostics. We can help you accurately identify the root cause of motor failures, perform necessary repairs, and advise on preventative maintenance strategies to extend your equipment’s lifespan.
Don’t let a faulty motor disrupt your operations any longer. If you’re experiencing motor issues, require expert diagnostics, or need reliable industrial supplies, contact CEM Industrial Supply today. We are your trusted partner for all your electric motor repair, diagnostics, and supply needs. Visit us at cemindustrialsupply.com or call us to discuss your specific requirements.