
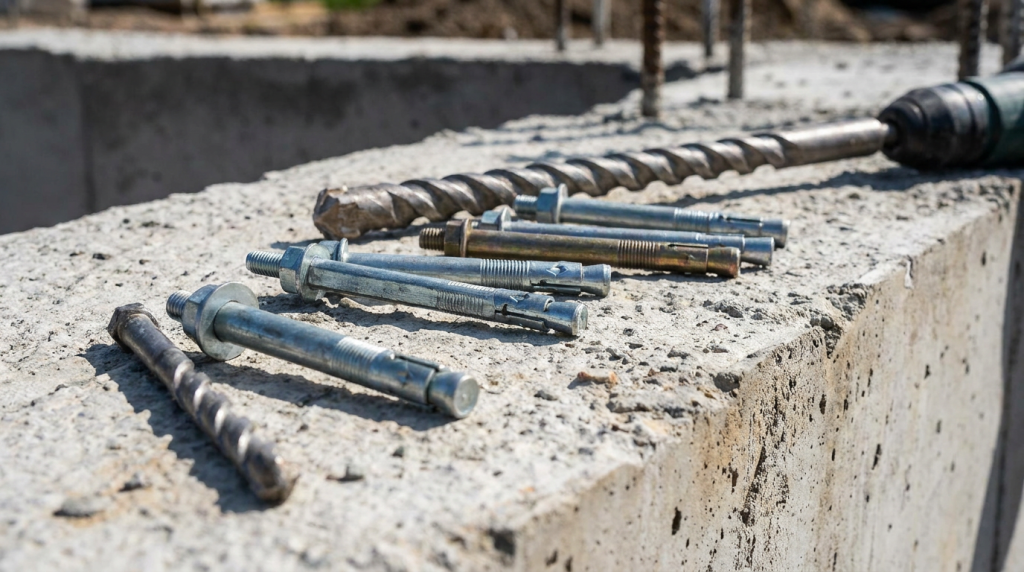
Installing concrete anchors correctly is essential for creating a strong, long-lasting connection between fixtures and concrete, brick, or masonry surfaces. Whether you’re mounting shelving in a garage, securing machinery to a concrete floor, installing handrails, or fastening structural brackets, choosing the right anchor and following proper installation procedures helps ensure a safe and reliable installation.
The basic process involves selecting the correct anchor, drilling a properly sized hole with a hammer drill, thoroughly cleaning the hole, installing the anchor according to the manufacturer’s specifications, and tightening it to the recommended torque. While the process is straightforward, small mistakes such as using the wrong drill bit or failing to remove concrete dust can dramatically reduce holding strength.
This guide explains everything you need to know about installing concrete anchors, including how to choose the correct anchor, the tools you’ll need, common mistakes to avoid, and professional installation tips used by contractors every day.
Whether you’re a contractor, maintenance technician, facility manager, farmer, manufacturer, or homeowner tackling your first concrete project, this guide will help you complete the job safely and correctly.
What Are Concrete Anchors?
Concrete anchors are specialized fasteners designed to attach objects securely to concrete, masonry block, brick, or stone. Unlike ordinary wood screws or drywall anchors, concrete anchors are engineered to withstand the hardness of concrete while providing exceptional holding power under both static and dynamic loads.
Concrete anchors are commonly used for:
- Installing handrails
- Mounting machinery
- Securing structural steel
- Fastening wood framing to concrete
- Installing shelving
- Mounting electrical conduit
- Securing signs
- Installing fencing and gates
- Attaching safety barriers
- Mounting HVAC equipment
Choosing the correct anchor is just as important as installing it correctly. An undersized or improperly selected anchor can fail prematurely, potentially creating expensive repairs or serious safety hazards.
Common Types of Concrete Anchors
| Anchor Type | Best For | Base Material | Removable |
|---|---|---|---|
| Wedge Anchor | Heavy-duty structural fastening | Solid concrete | No |
| Sleeve Anchor | Medium-duty applications | Concrete, brick, block | No |
| Concrete Screw (Tapcon® style) | Light to medium loads | Concrete, brick, block | Yes |
| Drop-In Anchor | Threaded rod installations | Solid concrete | Bolt removable |
| Epoxy/Chemical Anchor | Maximum holding strength | Concrete | Rod removable after curing |
How to Choose the Right Concrete Anchor
Before drilling your first hole, answer these questions:
- How much weight will the anchor support?
- Is the load permanent or temporary?
- Will there be vibration?
- Is the installation indoors or outdoors?
- Is the base material solid concrete or hollow masonry?
- Will the anchor support people or life-safety equipment?
The answers determine which anchor style, diameter, embedment depth, and material should be used.
For example:
Use wedge anchors when installing:
- Structural steel
- Heavy machinery
- Bollards
- Guardrails
- Industrial shelving
Use sleeve anchors when installing:
- Signs
- Handrails
- Fence brackets
- Outdoor fixtures
- Masonry applications
Use concrete screws when installing:
- Electrical boxes
- Furring strips
- Wood framing
- Light shelving
- Door frames
Use drop-in anchors when installing:
- Threaded rod
- Pipe hangers
- HVAC supports
- Suspended ceilings
Use epoxy anchors when installing:
- Heavy structural loads
- Rebar doweling
- Seismic applications
- Cracked concrete
- High-load industrial equipment
Tools You’ll Need
Having the proper tools makes installation easier while improving the quality of the finished job.
Recommended tools include:
- Hammer drill or rotary hammer
- Carbide masonry drill bits
- Tape measure
- Marker or pencil
- Vacuum or compressed air
- Hole cleaning brush
- Hammer
- Socket set
- Torque wrench
- Safety glasses
- Hearing protection
- Dust mask or respirator
- Work gloves
- Level
If you’re unsure whether a hammer drill or rotary hammer is the better choice for your project, read our guide:
Hammer Drill vs. Rotary Hammer: Concrete Drilling Explained
Using the correct drill can significantly reduce drilling time while extending the life of your bits.
Selecting the Proper Drill Bit
One of the biggest installation mistakes is using the wrong size drill bit.
The hole diameter must match the manufacturer’s specifications exactly.
A hole that’s too small may prevent installation.
A hole that’s too large can dramatically reduce holding power.
Most anchor manufacturers publish a chart listing:
- Required drill bit diameter
- Minimum embedment depth
- Minimum edge distance
- Minimum anchor spacing
- Torque specifications
Always verify these specifications before drilling.
Concrete Surface Preparation
Before drilling, inspect the concrete carefully.
Look for:
- Large cracks
- Spalling
- Loose concrete
- Moisture damage
- Existing anchor holes
- Embedded rebar
- Surface deterioration
Avoid placing anchors near damaged concrete whenever possible.
Likewise, avoid drilling too close to corners or slab edges unless the anchor manufacturer specifically approves those installation distances.
Mark the Installation Points
Measure carefully before drilling.
For brackets or mounting plates:
- Hold the fixture in place.
- Mark each hole location.
- Verify measurements.
- Check for level.
- Confirm spacing.
Accurate layout helps prevent oversized holes caused by repositioning anchors later.
Professional installers often use transfer punches or layout templates when installing multiple anchors.
Step-by-Step: How to Install Concrete Anchors
Step 1: Measure and Mark
Position the fixture exactly where it will be installed.
Mark every anchor location clearly.
Double-check all measurements before drilling.
Remember the old carpenter’s rule:
Measure twice.
Drill once.
Step 2: Install the Correct Masonry Bit
Insert the correct carbide masonry bit into your hammer drill.
Verify:
- Diameter
- Length
- Wear condition
A dull masonry bit generates excessive heat and significantly slows drilling.
If you’re drilling dozens of holes, keep spare bits available.
Step 3: Drill the Hole
Set the drill to hammer mode.
Hold it perpendicular to the concrete.
Apply firm, consistent pressure without forcing the tool.
Allow the hammer mechanism to perform the work.
Most professionals drill slightly deeper than the required embedment depth to provide room for dust accumulation.
If you’re drilling multiple holes in reinforced concrete, consider using a rotary hammer for increased efficiency.
Step 4: Clean the Hole Thoroughly
This is one of the most overlooked—and most important—steps.
Concrete dust prevents anchors from achieving maximum holding strength.
Clean the hole using one or more of the following:
- Vacuum
- Compressed air
- Nylon hole brush
- Blow-out bulb
For chemical anchors, follow the adhesive manufacturer’s recommended cleaning procedure exactly.
A properly cleaned hole can significantly improve anchor performance.
Step 5: Install the Anchor
Installation varies depending on anchor type.
Wedge Anchors
Insert the anchor through the fixture.
Tap it gently into the drilled hole until fully seated.
Tighten the nut to the specified torque.
Sleeve Anchors
Insert the anchor through the mounted fixture.
Tap lightly if necessary.
Tighten until the sleeve expands securely inside the concrete.
Concrete Screws
Drive the screw into the pilot hole using the correct driver bit.
Do not overtighten.
If excessive resistance occurs, remove the screw and verify hole depth and cleanliness.
Drop-In Anchors
Insert the anchor flush with the concrete.
Use the manufacturer’s setting tool to expand the anchor.
Install the threaded rod or bolt afterward.
Epoxy Anchors
Inject adhesive starting from the back of the hole.
Insert threaded rod while slowly rotating it.
Allow the adhesive to cure completely before applying any load.
Step 6: Tighten Properly
More torque does not always equal a stronger installation.
Overtightening may:
- Crack concrete
- Strip threads
- Damage anchors
- Reduce holding capacity
- Distort mounting brackets
Whenever possible, use a calibrated torque wrench and follow the manufacturer’s published torque values.
Choosing Galvanized vs. Stainless Steel Anchors
Anchor material is just as important as anchor design.
Zinc-plated anchors
Best for dry indoor environments.
Hot-dip galvanized anchors
Recommended for outdoor installations and treated lumber.
304 stainless steel
Excellent corrosion resistance for most outdoor applications.
316 stainless steel
Ideal for coastal environments, chemical exposure, wastewater facilities, and marine applications.
Using the wrong material can lead to premature corrosion and expensive repairs.
Edge Distance and Anchor Spacing
Improper spacing is one of the leading causes of concrete failure.
As a general rule:
- Never install expansion anchors too close to slab edges.
- Maintain proper spacing between adjacent anchors.
- Follow manufacturer recommendations for minimum embedment.
For structural applications, always follow engineering specifications and local building codes rather than relying on general guidelines.
Common Mistakes to Avoid
Even experienced installers occasionally make mistakes that reduce anchor performance.
Avoid these common problems:
Using the wrong anchor type
Choosing an anchor that is not rated for the application can lead to premature failure.
Drilling oversized holes
An oversized hole reduces expansion pressure and holding strength.
Skipping hole cleaning
Concrete dust acts as a lubricant between the anchor and the concrete, significantly reducing grip.
Using worn drill bits
Worn bits often produce oversized or irregular holes.
Installing near slab edges
Expansion anchors generate outward pressure that can crack concrete when installed too close to edges.
Overtightening
Too much torque can permanently damage both the anchor and the surrounding concrete.
Loading epoxy anchors too early
Chemical anchors require full cure time before being placed into service.
Concrete Anchor Installation Tips from the Pros
Professional contractors know that successful concrete anchor installations depend on more than simply drilling a hole and inserting an anchor. Small details can make a significant difference in holding strength, installation speed, and long-term reliability.
Drill Slightly Deeper Than Required
Many manufacturers recommend drilling the hole slightly deeper than the minimum embedment depth. This allows concrete dust to collect below the anchor instead of preventing it from seating completely.
A hole that’s too shallow may keep the anchor from fully engaging.
Keep the Drill Perpendicular
An angled hole reduces the anchor’s contact with the surrounding concrete and can place uneven stress on the fastener.
Hold the drill straight and steady throughout the drilling process.
For large projects, many contractors use drilling guides or templates to ensure perfectly aligned holes.
Replace Worn Masonry Bits
Masonry bits wear faster than many people realize.
Signs it’s time for a new bit include:
- Slow drilling
- Excessive heat
- Smoke
- Chipped carbide tips
- Larger-than-normal holes
Replacing a worn bit often saves more time than trying to finish the job with a dull one.
Use a Depth Stop
Consistency matters, especially when installing multiple anchors.
Many hammer drills include adjustable depth stops. If yours doesn’t, wrap masking tape around the drill bit at the required drilling depth.
This simple trick prevents under-drilling and over-drilling.
Test the Fixture Before Final Tightening
Once every anchor is installed, loosely assemble the fixture before tightening everything completely.
This gives you a chance to make minor adjustments without placing unnecessary stress on the anchors.
Professional installers almost never fully tighten the first anchor until every anchor has been started.
Indoor vs. Outdoor Concrete Anchors
Environmental conditions play a major role in anchor selection.
Indoor Installations
Indoor applications generally experience less moisture and corrosion.
Common examples include:
- Warehouse shelving
- Manufacturing equipment
- Storage racks
- Electrical conduit
- Interior handrails
Zinc-plated anchors are often suitable for dry indoor conditions.
Outdoor Installations
Outdoor anchors are exposed to:
- Rain
- Snow
- Freeze-thaw cycles
- UV exposure
- Road salt
- Fertilizers
- Moisture
For these environments, use anchors specifically designed for exterior applications.
Hot-dip galvanized or stainless-steel anchors provide significantly better corrosion resistance than standard zinc-plated hardware.
Heavy-Duty vs. Light-Duty Applications
Choosing an anchor based solely on diameter is a common mistake.
Instead, match the anchor to the application.
Light-Duty Projects
Suitable for:
- House numbers
- Small signs
- Electrical boxes
- Cable clips
- Decorative fixtures
Concrete screws are often the best option.
Medium-Duty Projects
Suitable for:
- Wall shelving
- Fence brackets
- Outdoor lighting
- Mailboxes
- Gate hardware
Sleeve anchors are a popular choice.
Heavy-Duty Projects
Suitable for:
- Structural steel
- Industrial equipment
- Vehicle lifts
- Machinery
- Bollards
- Commercial shelving
Wedge anchors or epoxy anchors are generally recommended.
Always consult manufacturer load ratings before selecting anchors for structural applications.
Safety Considerations
Working with concrete creates hazards that shouldn’t be ignored.
Always wear:
- ANSI-approved safety glasses
- Hearing protection
- Work gloves
- Steel-toe footwear when appropriate
- NIOSH-approved dust mask or respirator
Concrete dust contains crystalline silica, which can be hazardous if inhaled over time.
Whenever possible:
- Drill with dust extraction.
- Vacuum the work area.
- Work in well-ventilated locations.
- Follow OSHA silica exposure guidelines.
Building Code Considerations
While many residential projects don’t require engineered anchor designs, commercial and industrial installations often do.
Examples include:
- Guardrails
- Handrails
- Structural steel
- Fire protection systems
- Machinery anchoring
- Suspended mechanical equipment
- Public facilities
Local building codes may specify:
- Anchor type
- Embedment depth
- Corrosion protection
- Seismic ratings
- Wind load requirements
- Inspection requirements
When installing anchors for life-safety applications, always follow applicable building codes and engineering specifications.
Troubleshooting Common Problems
The Anchor Spins in the Hole
Possible causes:
- Hole too large
- Dust left in the hole
- Incorrect anchor
- Damaged concrete
Possible solutions:
- Move to a new location.
- Use a larger anchor if approved.
- Use a chemical anchor.
- Repair damaged concrete.
The Concrete Cracks
Possible causes:
- Hole too close to edge
- Anchor overtightened
- Anchor too large
- Weak concrete
Always replace damaged concrete before reinstalling anchors.
The Anchor Won’t Seat Completely
Check for:
- Hole too shallow
- Dust accumulation
- Rebar obstruction
- Incorrect drill bit
Never force an anchor into an undersized hole.
The Concrete Screw Won’t Tighten
Possible causes:
- Hole oversized
- Hole too deep
- Dust remaining
- Worn threads
Remove the screw and inspect both the hole and the fastener before reinstalling.
Frequently Asked Questions
Can I install concrete anchors without a hammer drill?
For very small jobs in softer masonry, it’s possible, but a hammer drill is strongly recommended. It drills faster, produces cleaner holes, and reduces wear on drill bits.
What’s the strongest type of concrete anchor?
Properly installed epoxy anchors generally provide the highest load capacity, followed by wedge anchors for heavy-duty mechanical fastening.
Can concrete anchors be reused?
Most expansion anchors should not be reused after removal. Concrete screws may sometimes be reused for light-duty applications if neither the screw nor the concrete has been damaged, but replacement is usually recommended.
How deep should a concrete anchor be installed?
Embedment depth varies by anchor type and manufacturer. Always follow the installation instructions provided with the anchor rather than estimating.
Why is cleaning the hole so important?
Concrete dust reduces friction and bonding strength. Cleaning the hole ensures the anchor can achieve its full rated holding capacity.
Can I install anchors into cracked concrete?
Some anchors are specifically rated for cracked concrete, while others are not. Verify the manufacturer’s specifications before installation.
Are stainless steel anchors worth the extra cost?
For outdoor, marine, wastewater, agricultural, and corrosive environments, stainless steel anchors often provide a much longer service life and lower maintenance costs.
Related Articles
To learn more about concrete drilling, fasteners, and industrial tools, explore these additional resources from CEM Industrial Supply:
- Hammer Drill vs. Rotary Hammer: Concrete Drilling Explained
- Choosing the Right Drill Bit for Every Job
- How to Choose the Right Fasteners for Construction Projects
- Essential PPE for Construction and Industrial Work
- Cordless vs. Corded Power Tools: Which Is Right for You?
Need the Right Concrete Anchors?
Whether you’re securing heavy machinery, mounting structural steel, fastening shelving, or completing a residential improvement project, using high-quality anchors and installation tools helps ensure a safe, reliable installation that will last for years.
CEM Industrial Supply carries professional-grade tools, fasteners, safety equipment, drill bits, and construction supplies for contractors, manufacturers, maintenance teams, municipalities, agricultural operations, and serious DIYers.
If you’re unsure which concrete anchor is best for your project, our team is happy to help you choose the right solution.
[fluentform id=”3″]
Final Thoughts
Installing concrete anchors isn’t difficult, but it does require attention to detail. Selecting the proper anchor, drilling accurately, cleaning the hole thoroughly, and tightening the fastener according to the manufacturer’s recommendations all contribute to a secure, long-lasting installation.
Whether you’re installing a single shelf bracket in your garage or anchoring industrial equipment in a manufacturing facility, taking the time to do the job correctly improves safety, increases holding strength, and reduces the likelihood of costly repairs down the road.
Using quality anchors, the proper tools, and proven installation techniques ensures your project remains secure and dependable for years to come.