
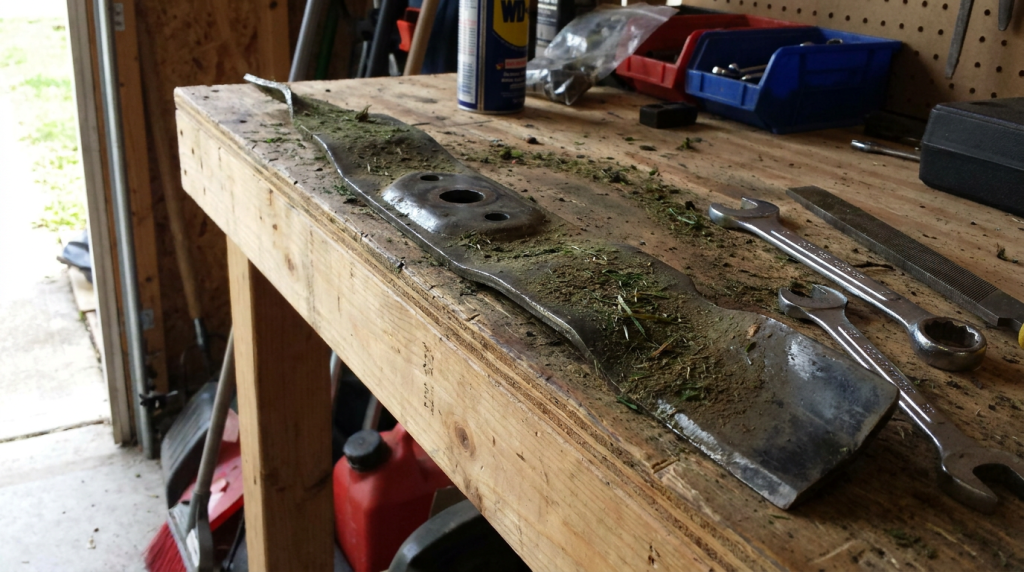
A sharp riding mower blade is essential for a healthy, attractive lawn. Sharp blades make clean cuts that help grass recover quickly, while dull or damaged blades tear grass instead of cutting it, leaving brown tips, increasing the risk of lawn disease, and forcing your mower to work harder.
Fortunately, changing a riding mower blade is a straightforward maintenance task that most homeowners can complete with basic tools and a little preparation. This guide explains when to replace a riding mower blade, how to do it safely, and how to keep your mower performing at its best.
Why Riding Mower Blades Matter
Your mower blade does much more than shorten grass.
A sharp, properly balanced blade:
- Produces a clean, even cut
- Promotes healthier grass growth
- Reduces stress on the mower engine
- Improves fuel efficiency
- Creates a better-looking lawn
- Reduces the chance of lawn disease
- Helps mulching blades perform properly
A dull blade tears grass rather than slicing it cleanly, causing ragged edges that quickly turn brown.
Signs It’s Time to Replace or Sharpen the Blade
Inspect your mower blades regularly.
Common signs include:
- Brown grass tips after mowing
- Ragged cuts
- Uneven mowing patterns
- Strips of uncut grass
- Excessive vibration
- Bent blade
- Deep nicks
- Cracks
- Excessive rust
- Thin cutting edges
Minor dullness can often be corrected by sharpening, but cracked or bent blades should always be replaced.
Types of Riding Mower Blades
Different mowing conditions require different blade designs.
Standard Blades
Ideal for routine residential mowing.
Mulching Blades
Designed to finely chop grass clippings before returning them to the lawn.
High-Lift Blades
Provide greater airflow for improved bagging performance.
Low-Lift Blades
Better suited for dry, sandy, or dusty conditions.
Always install the blade type recommended by your mower manufacturer.
Tools You’ll Need
Before starting, gather:
- Work gloves
- Safety glasses
- Socket wrench
- Breaker bar (if needed)
- Torque wrench
- Block of wood
- Replacement blade
- Penetrating oil
- Wire brush
- Shop towels
- Mower lift, ramps, or jack stands
Consult your owner’s manual for the correct socket size and torque specifications.
Safety First
Before working beneath the mower:
- Park on level ground.
- Turn off the engine.
- Remove the ignition key.
- Allow the engine to cool.
- Set the parking brake.
- Disconnect the spark plug wire.
- Chock the wheels if necessary.
Never work beneath an unsupported mower.
Use approved mower lifts, ramps, or jack stands.
Step 1: Raise the Mower Safely
Depending on your mower, you may:
- Raise the front wheels onto ramps
- Use a mower lift
- Remove the mower deck
Ensure the mower is fully supported before working underneath.
Step 2: Locate the Blade
Most riding mowers have:
- One blade
- Two blades
- Three blades
Locate the blade bolt in the center of each blade.
Before removal, observe the blade orientation.
The lift wings generally point upward toward the mower deck.
Step 3: Prevent Blade Rotation
Insert a sturdy block of wood between the blade and mower deck.
This prevents the blade from turning while loosening the mounting bolt.
Never hold the blade by hand while loosening the bolt.
Step 4: Remove the Blade
Using the proper socket:
Loosen the center bolt.
If the bolt is difficult to remove:
- Apply penetrating oil.
- Allow it to soak.
- Use a breaker bar if necessary.
Remove:
- Blade
- Bolt
- Washers
- Spacers
Keep everything organized for reassembly.
Step 5: Inspect the Blade
Determine whether sharpening or replacement is appropriate.
Replace the blade if you find:
- Cracks
- Severe rust
- Bent edges
- Missing sections
- Excessive wear
Never attempt to straighten a bent mower blade.
Step 6: Clean the Deck
Before installing the new blade:
Remove:
- Grass buildup
- Dirt
- Debris
- Rust
Cleaning the mower deck improves airflow and cutting performance.
Step 7: Compare the Replacement Blade
Verify that the new blade matches the original:
- Length
- Width
- Center hole
- Lift design
- Mounting pattern
Installing the wrong blade can damage the mower or reduce cutting performance.
Step 8: Install the New Blade
Position the blade correctly.
Most blades are marked:
- Grass Side
- Bottom
- This Side Down
If no markings exist, the lift wings generally point upward toward the mower deck.
Install all washers and spacers in the correct order.
Step 9: Tighten the Blade Bolt
Use a torque wrench.
Tighten the blade bolt to the manufacturer’s recommended specification.
Proper torque is critical.
An under-tightened blade can loosen during operation.
An over-tightened bolt can damage the spindle.
Step 10: Repeat for Remaining Blades
If your mower has multiple blades:
Replace them all together whenever possible.
This helps maintain:
- Balanced cutting
- Consistent performance
- Even grass height
Step 11: Test the Mower
Reconnect the spark plug wire.
Start the mower.
Engage the blades briefly.
Listen for:
- Vibration
- Grinding
- Clicking
- Unusual noises
If vibration occurs, stop immediately and inspect the installation.
Sharpening vs. Replacing
Sharpening is appropriate when:
- The blade is dull.
- Minor nicks are present.
- The blade remains structurally sound.
Replacement is recommended when:
- The blade is cracked.
- It is bent.
- The cutting edge is excessively worn.
- Heavy corrosion exists.
- The blade cannot be balanced.
Balancing the Blade
Any sharpened blade should be balanced before installation.
An unbalanced blade can cause:
- Excessive vibration
- Spindle wear
- Bearing damage
- Uneven cutting
Use a blade balancer or balance the blade on a nail through its center hole.
Common Mistakes to Avoid
Avoid these common errors:
Installing the blade upside down
Using the wrong replacement blade
Failing to disconnect the spark plug
Skipping torque specifications
Ignoring blade balance
Reusing damaged hardware
Continuing to mow despite vibration
Most mower damage after blade replacement results from improper installation rather than defective parts.
How Often Should Riding Mower Blades Be Changed?
For most homeowners:
- Inspect blades before every mowing season.
- Sharpen every 20–25 hours of mowing.
- Replace as needed based on wear or damage.
Commercial users may replace blades several times each season.
Always inspect blades after striking:
- Rocks
- Tree roots
- Curbs
- Large branches
- Landscape edging
Mower Blade Maintenance Tips
To extend blade life:
- Remove sticks before mowing.
- Avoid striking rocks.
- Clean the deck regularly.
- Keep blades balanced.
- Sharpen before they become excessively dull.
- Store replacement blades in a dry location.
Routine maintenance improves mowing performance and extends mower life.
Related Articles
Continue maintaining your outdoor equipment with these helpful guides:
- Winterize Outdoor Equipment
- Repair Rusted Metal Gates
- Replace a Hydraulic Hose
- Install a New Door Closer
- Essential PPE for Outdoor Equipment Maintenance
Frequently Asked Questions
How often should I replace my riding mower blades?
Most homeowners replace blades every one to three seasons, depending on mowing frequency, terrain, and blade condition. Sharpening several times before replacement is common.
Can I sharpen mower blades instead of replacing them?
Yes. If the blade is structurally sound and only dull, sharpening is usually sufficient. Bent, cracked, or heavily worn blades should be replaced.
Which direction does the mower blade face?
The lift wings generally face upward toward the mower deck. Many replacement blades are labeled “Grass Side” or “Bottom” to simplify installation.
Why does my mower vibrate after changing the blade?
Common causes include an unbalanced blade, incorrect installation, loose mounting hardware, or a bent spindle. Stop mowing immediately and inspect the installation.
Do I need a torque wrench to install mower blades?
Yes. Using a torque wrench helps ensure the blade bolt is tightened to the manufacturer’s specifications, preventing both loose blades and damaged components.
Keep Your Riding Mower Performing Like New
Changing a riding mower blade is one of the most important maintenance tasks for achieving a healthier lawn and extending the life of your equipment. By replacing worn blades, following proper safety procedures, and inspecting your mower regularly, you’ll enjoy cleaner cuts, improved mower performance, and fewer costly repairs.
Whether you’re maintaining a residential lawn tractor, commercial zero-turn mower, or garden tractor, CEM Industrial Supply offers the replacement blades, hand tools, lubricants, safety equipment, fasteners, and maintenance supplies you need to keep your mower operating at peak performance.